Seafood Fried Rice Recipe — The Complete Guide to Restaurant-Quality Results at Home
Seafood Fried Rice Recipe — From Wok Technique to Plating
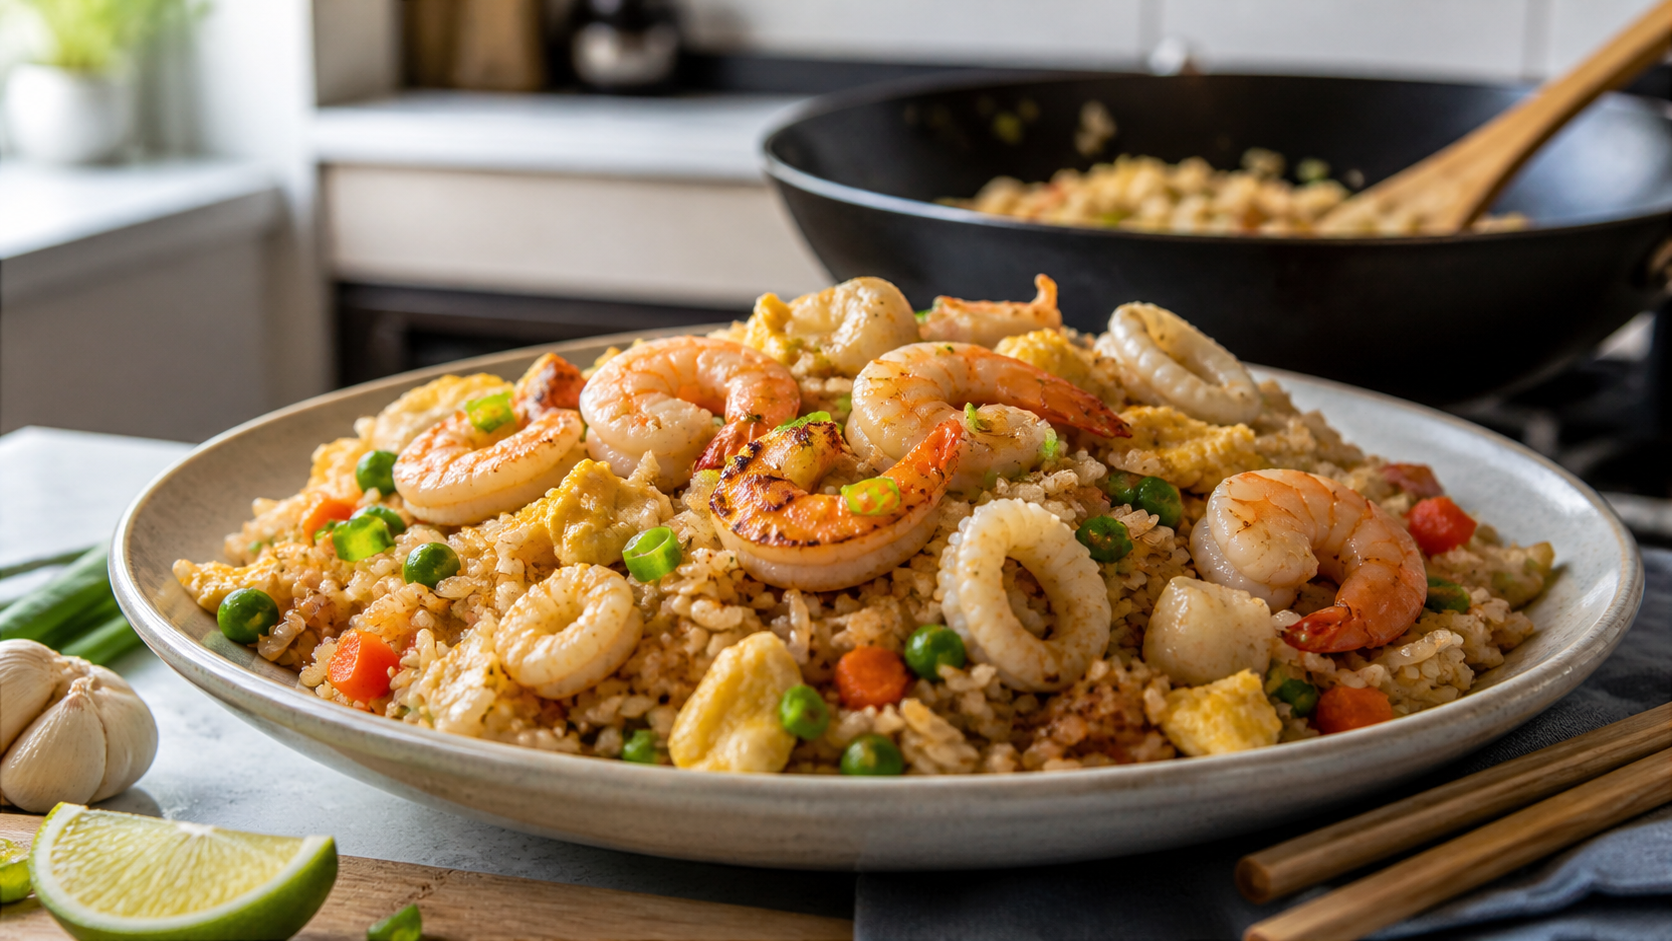
Most people who try making a seafood fried rice recipe at home get something that tastes like steam-cooked rice with rubbery shrimp on top. It’s edible, sometimes even decent, but it’s never that version — the one from the good Thai place or the Chinese takeout spot where the rice has distinct grains, each one slightly browned and coated, the seafood tender rather than tight, and the whole dish carrying that faint smoky depth that’s difficult to name but immediately recognizable.
That depth has a name: wok hei — literally “breath of the wok.” It comes from extremely high heat, rapid moisture evaporation, and the Maillard browning of rice, protein, and aromatics happening simultaneously in a vessel that conducts and retains heat in a specific way. Home stoves can replicate this, though not perfectly. Understanding what you’re actually trying to achieve — and why day-old rice, dry seafood, and high heat aren’t optional — is what separates consistently good home fried rice from the steamed variety.
Why Day-Old Rice Is Non-Negotiable — The Science Explained
This is the single most important variable in any fried rice recipe, and the reason is worth understanding rather than just following as a rule.
Freshly cooked rice contains a significant amount of free surface moisture. When you add it to a hot wok, that moisture converts to steam instantly — steaming the rice from within and causing individual grains to stick together into clumps. The result is soft, mushy fried rice that can’t develop any crust or individual grain texture regardless of how hot your pan is.
Day-old rice (refrigerated for 12–48 hours) has lost most of its free surface moisture. The starch on the exterior of each grain has also undergone a process called retrogradation — partial re-crystallization — which creates a slightly firmer, more resilient grain surface that holds up under high heat without breaking apart. Each grain stays separate, can absorb the sauce and aromatics individually, and can develop that lightly toasted exterior that defines good fried rice.
What if you only have fresh rice? Spread it in a thin layer on a baking sheet, uncovered, and refrigerate for at least 2 hours — better if 4. The forced air circulation in the refrigerator speeds surface moisture loss. This isn’t as effective as overnight rice, but it produces workable results. When you’re ready to cook, break up any clumps with damp hands before adding to the wok.
Rice type matters too: Medium-grain white rice is the standard in Chinese-style fried rice. Jasmine rice is excellent — its fragrance adds a background floral note that complements seafood particularly well. Long-grain rice works but tends to be drier and less cohesive. Short-grain or sushi rice is too sticky — it clumps even as day-old rice. Brown rice can be substituted for a more nutritious, nuttier version but requires adjusting expectations on texture.
The egg yolk coating technique: One advanced preparation method from Cantonese technique involves coating the cooled rice with egg yolks before it goes into the wok. Mix 1–2 egg yolks thoroughly into 3 cups of day-old rice until every grain has a light yellow coating. This creates additional surface browning capability as the yolk proteins Maillard-react with the pan. The result is a richer-colored, more evenly browned fried rice. Egg whites are set aside and scrambled separately into the dish later.
The Core Seafood Fried Rice Recipe — Full Method
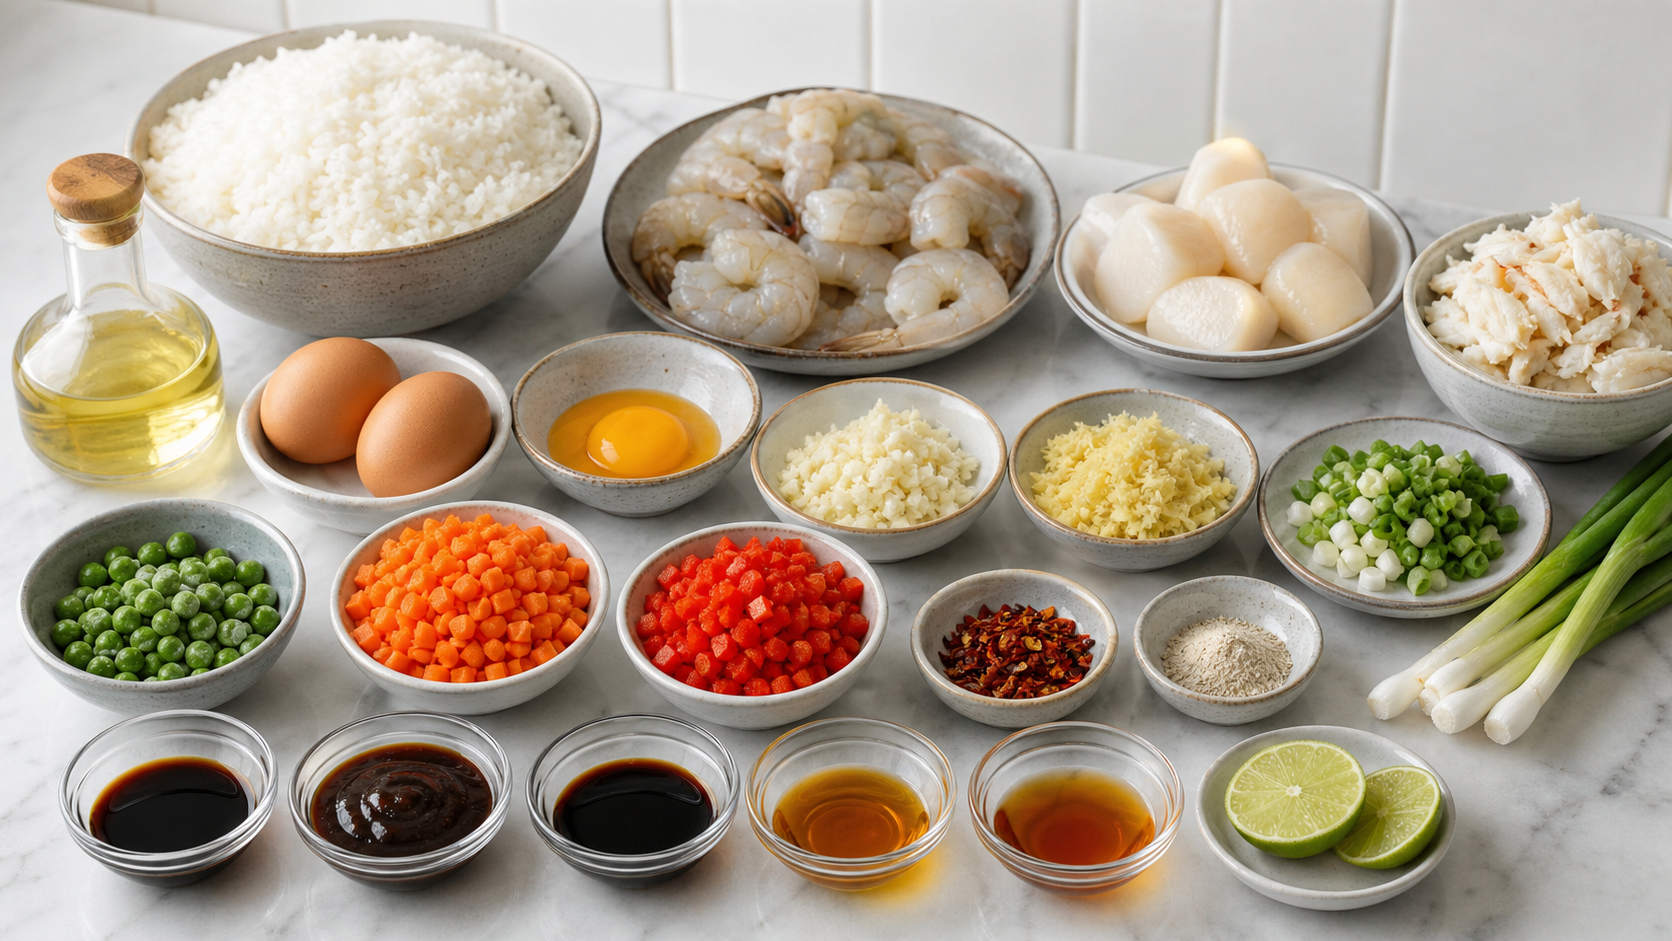
Ingredients (serves 3–4):
Seafood:
- 300g large shrimp (21–25 count), peeled and deveined
- 150g sea scallops, halved crosswise if large
- 150g lump crab meat (fresh or pasteurized, not imitation)
Rice base:
- 3 cups day-old cooked jasmine or medium-grain white rice
- 3 tablespoons neutral oil (peanut oil preferred for flavor and smoke point; vegetable or avocado oil acceptable)
- 2 eggs plus 1 extra yolk
Aromatics:
- 4 cloves garlic, finely minced
- 1 tablespoon fresh ginger, grated
- 3 spring onions (scallions), white and green parts separated
- 2 small dried red chilies or ½ teaspoon chili flakes
Vegetables:
- ½ cup frozen peas (thawed)
- 1 medium carrot, finely diced
- ½ red bell pepper, finely diced
Sauce:
- 3 tablespoons light soy sauce
- 1 tablespoon oyster sauce
- 1 teaspoon dark soy sauce (for color depth)
- 1 teaspoon sesame oil (added at the end only)
- 1 teaspoon fish sauce (optional but adds significant umami depth)
Finishing:
- White pepper to taste
- 1 lime or lemon, halved (for service)
Mise en place — set everything up before turning on the heat:
Fried rice moves too fast once the wok is hot for chopping or measuring mid-cook. Everything must be prepped, portioned into small bowls, and positioned near the stove before you start. Mince the garlic, dice the carrots and pepper, separate the scallion whites from greens, beat the eggs (keeping 1 yolk separate for the rice coating if using that technique), mix the sauce ingredients together in one small bowl, and pat every piece of seafood completely dry with paper towels.
Dry seafood is not optional. Surface moisture on shrimp or scallops converts immediately to steam when they hit the hot wok, preventing browning and introducing water that makes the rice wet and clumping. Paper towel-dry each piece twice if the seafood is wet from thawing.
The Step-by-Step Cooking Process — Order and Timing
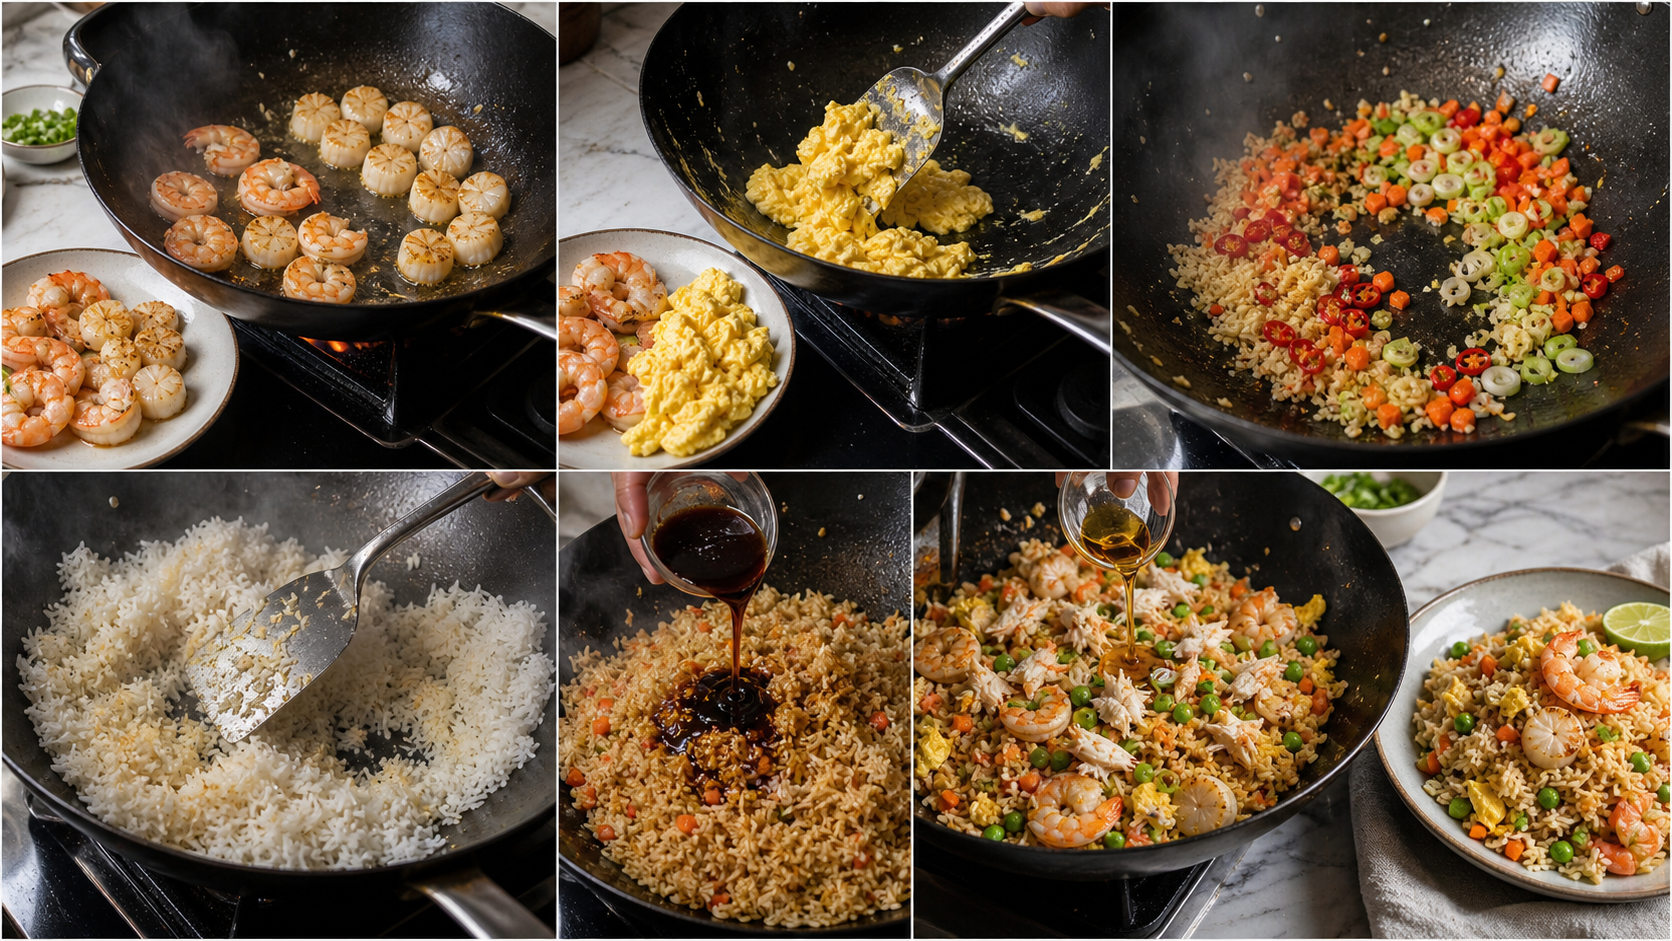
Step 1 — Sear the seafood first (total: 3–4 minutes)
Heat the wok over maximum heat for 3–4 minutes until it’s screaming hot — a drop of water should vaporize instantly on contact. Add 1 tablespoon of oil, swirl to coat, and when the oil begins to smoke, add shrimp in a single layer. Do not crowd; cook in two batches if needed. Cook undisturbed for 60–90 seconds until pink on one side. Flip and cook 45 seconds. Remove to a plate — they should be just barely cooked through, slightly underdone at the center. They will finish cooking when returned to the wok later.
Add scallops separately — the pan should be smoking before each batch. Cook flat side down, undisturbed, 60 seconds. Flip. 45 seconds. Remove. Fold crab meat in at the very end of cooking — it’s already cooked and only needs to warm through.
Why cook seafood first? Cooking the seafood separately and setting it aside is the technique that prevents rubberiness. If shrimp go into the wok with the rice and cook for the full duration of the fried rice process, they will be overcooked and tight. Separate cooking, with a return to the wok only in the final minute, gives you tender, properly cooked seafood in the finished dish.
Step 2 — Scramble the eggs (total: 1 minute)
Add ½ tablespoon of oil to the still-hot wok. Pour in beaten eggs (reserving the separate yolk if used in the rice). Let them set for 10 seconds without stirring — visible large curds produce better texture than fine scramble. Fold into large pieces and remove immediately to the same plate as the seafood. Large egg curds in fried rice look better and provide more textural contrast than finely scrambled eggs that disappear into the rice.
Step 3 — Aromatics and vegetables (total: 2 minutes)
Add 1 tablespoon of oil. Add the white parts of the scallions, garlic, ginger, and dried chilies. Stir-fry 15–20 seconds — do not walk away at this stage. Garlic burns in under 30 seconds at wok temperature. Add carrots and bell pepper. Stir-fry 2 minutes until slightly softened but not limp.
Step 4 — Rice (total: 3–4 minutes)
Add remaining oil and the day-old rice. Use a spatula to break up any clumps and press the rice against the hot wok surface. Let it sit undisturbed for 60–90 seconds — you want to hear a slight crackling as the rice grains begin to toast against the wok. This is the crust formation that provides texture and the beginning of the wok hei character. Fold and repeat — press, wait, fold — twice more.
Step 5 — Sauce (30 seconds)
Pour the combined sauce mixture over the rice and toss quickly to coat every grain. The dark soy sauce will produce visible color change immediately — the rice should go from white-yellow to golden-brown within 30 seconds of saucing. Toss rapidly.
Step 6 — Return seafood and finish (90 seconds)
Add shrimp, scallops, and the green scallion tops. Toss to combine. Add crab meat and fold gently — don’t break up the lumps. Add thawed peas. Remove from heat. Drizzle sesame oil over everything and toss once more — sesame oil added over heat loses most of its aromatic character, which is why it goes in last.
Serve immediately into bowls. Offer halved limes at the table — a squeeze of fresh citrus over seafood fried rice at service brightens every flavor in the dish without adding any recognizable lime taste. This is a finishing technique, not a flavoring.
Wok Hei at Home — Getting As Close As Possible Without a Restaurant Burner
Restaurant wok burners produce 50,000–150,000 BTU of heat. A standard gas home burner produces 7,000–15,000 BTU. Electric and induction stoves produce less heat than gas and often spread it less evenly. This gap is real, and it means perfect wok hei at home is difficult — but it’s reducible by a series of specific choices.
Use a carbon steel wok, not a non-stick wok: Carbon steel conducts heat faster, retains it more evenly, and can handle the high heat needed for wok cooking without warping or releasing coatings. Season it like cast iron. A non-stick wok works for moderate heat cooking but can’t reach or sustain the temperatures needed for wok hei.
If you have an outdoor grill: A high-BTU outdoor side burner or a wok ring over a gas grill burner can reach temperatures much closer to commercial wok burners than any indoor home stove. This is worth using if it’s available — the difference in final dish quality is significant.
The flat-top griddle method: An outdoor flat-top griddle (Blackstone or similar) allows you to spread the ingredients across a large, uniformly hot surface, adjusting which sections are hotter and which are cooler. This produces excellent fried rice with even browning and is increasingly popular for home cooks who want better results than a wok on an indoor stove.
Preheat the empty wok for at least 3–4 minutes: Most home cooks add oil within 30 seconds of putting the wok on the burner. The wok needs to be genuinely hot — not just warm — before oil is added. Properly preheated wok produces oil that reaches smoke point almost immediately, which is what creates the instantaneous high-heat searing that builds wok hei character.
Cook in smaller batches: The biggest enemy of home fried rice is overcrowding. When the wok is full, the temperature drops, moisture can’t escape, and everything steams. Three cups of rice and 600g of seafood is roughly the maximum for a 14-inch wok on a home stove. If cooking for 6+, cook in two separate batches.
Four Flavor Variations — Regional and Fusion Takes
Variation 1 — Thai-Style Seafood Fried Rice
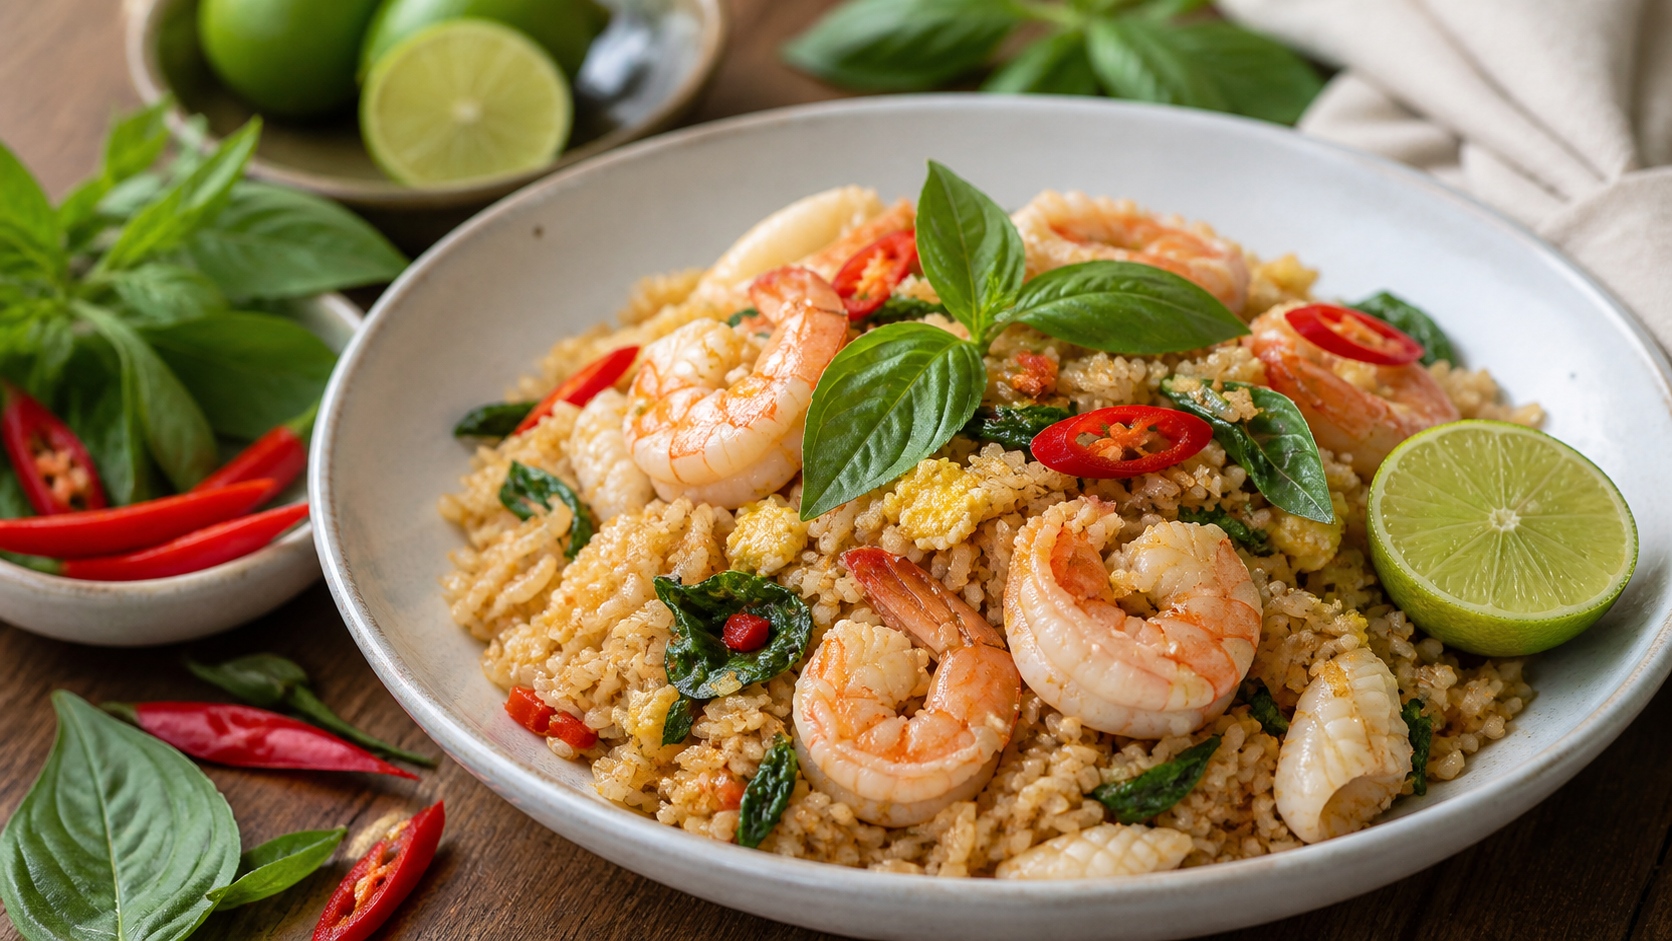
Replace soy sauce and oyster sauce with Thai fish sauce, add 1 tablespoon of Thai basil leaves (add just before the sesame oil), and finish with a squeeze of lime and sliced fresh red chili. Use shrimp and squid as the primary proteins. The fish sauce provides the saltiness; the basil provides an aromatic finish that’s distinctly Southeast Asian.
Variation 2 — Singapore-Style Black Pepper Seafood Rice
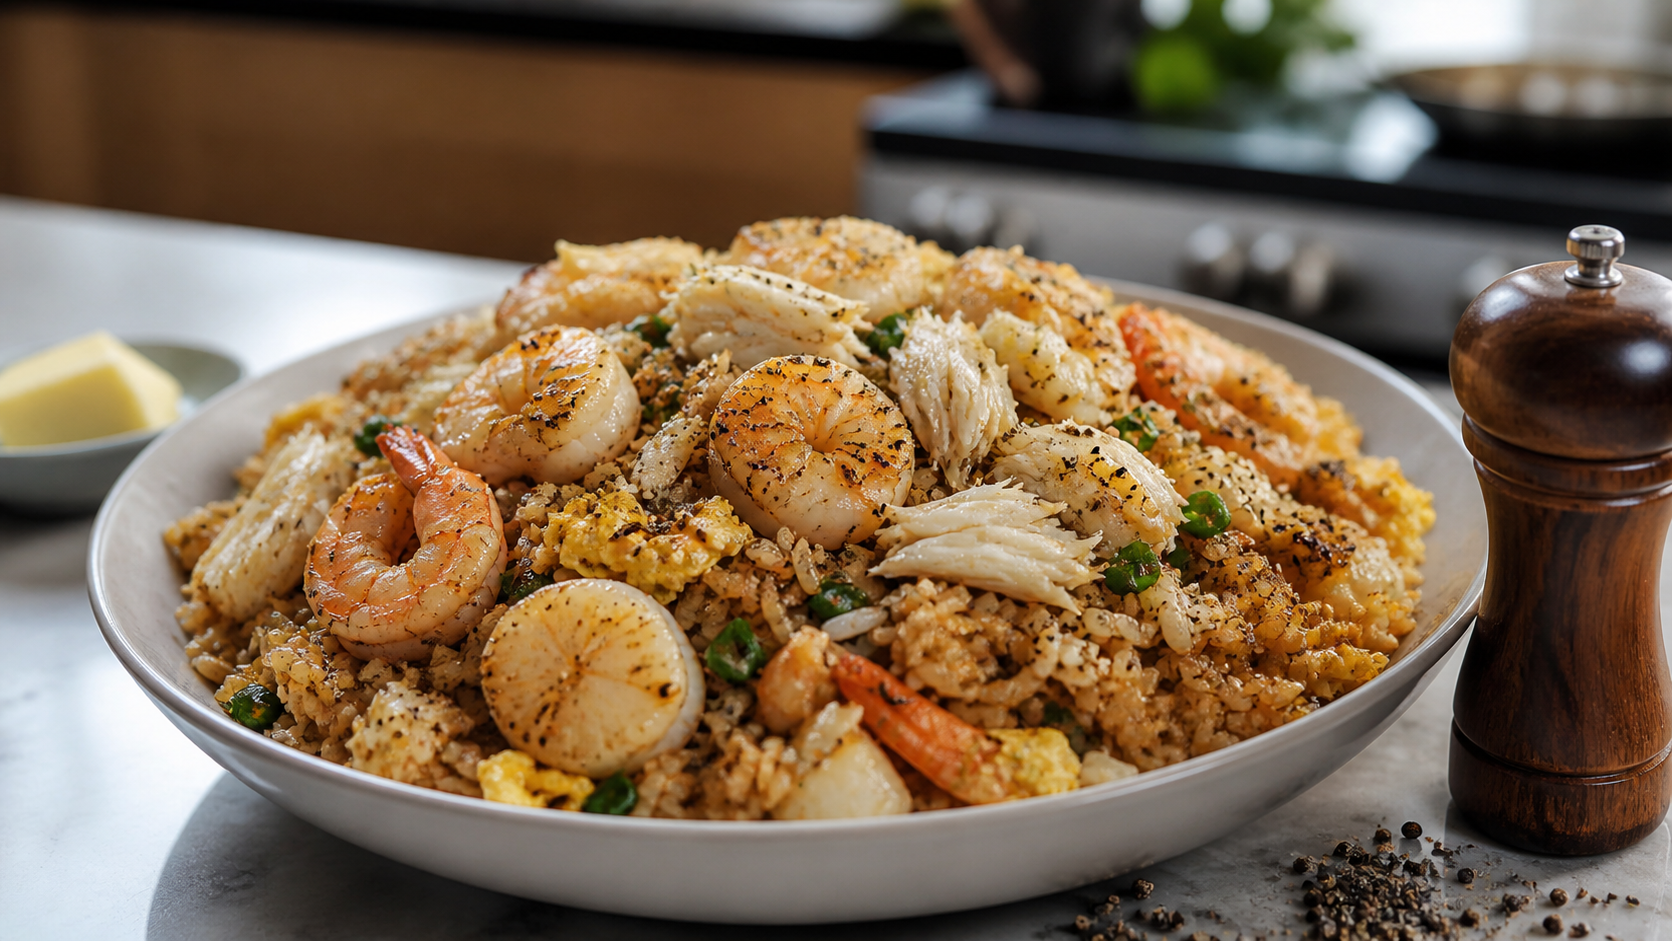
Singapore black pepper fried rice uses freshly cracked black pepper in large quantities (1–2 tablespoons) as the primary seasoning alongside oyster sauce and soy. Add 2 tablespoons of butter in the final 30 seconds for richness. Shellfish — crab, shrimp, and scallops — are the standard proteins. The result is intensely aromatic with a warming peppery heat that builds throughout the dish.
Variation 3 — Japanese-Style Takikomi (Seafood Rice)
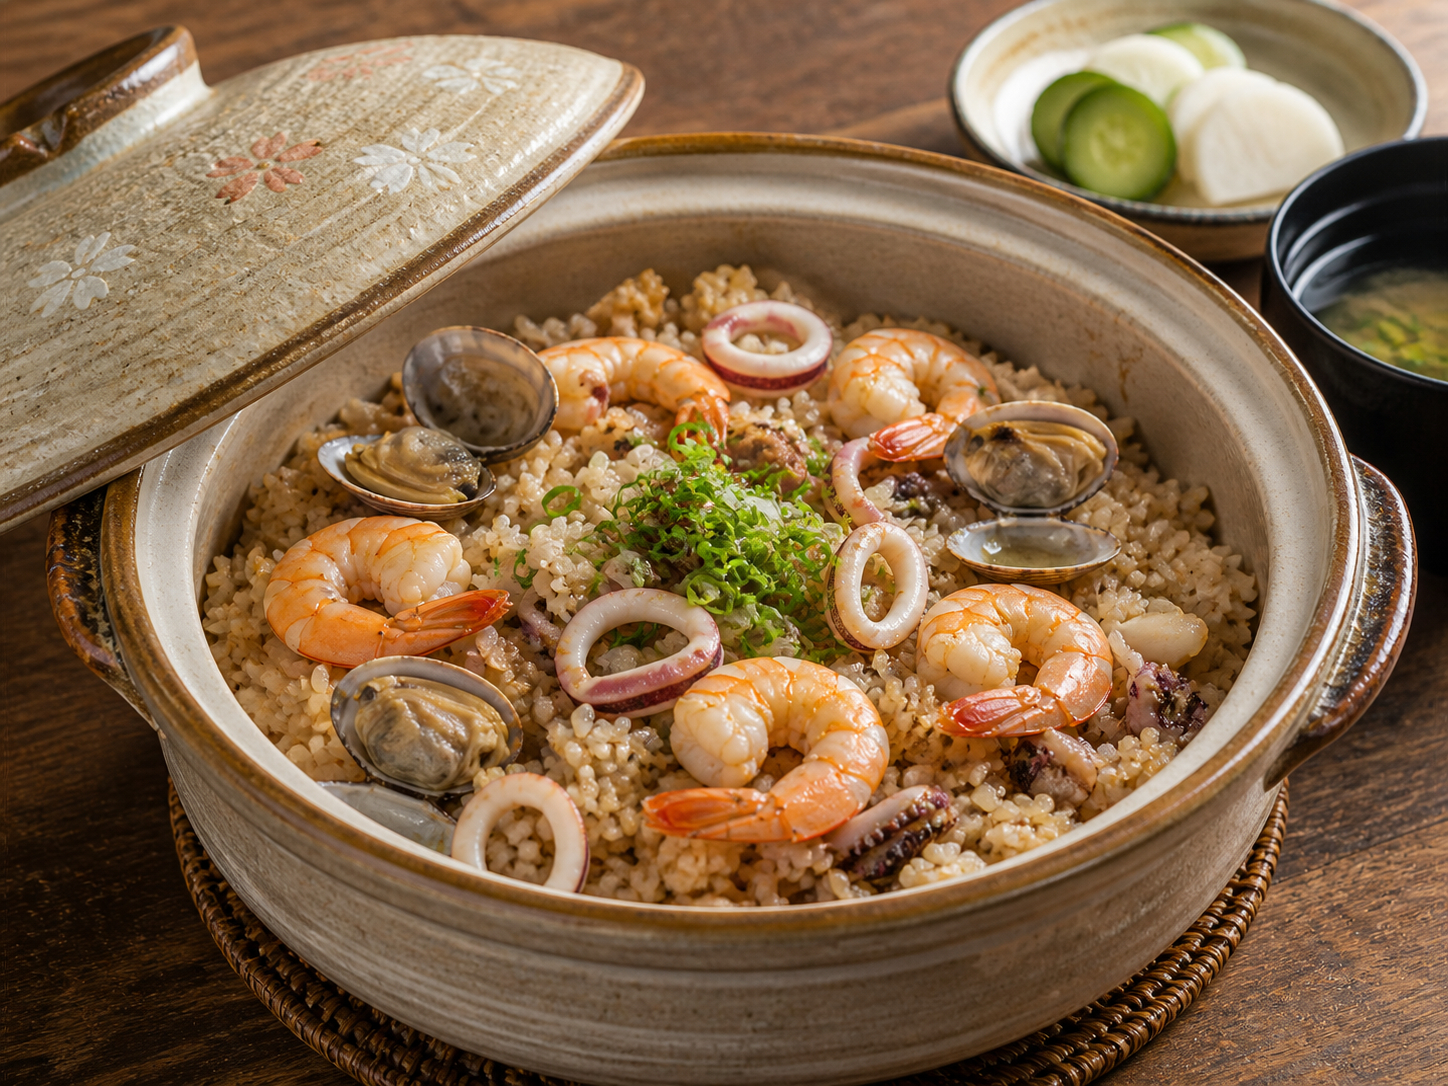
This is not technically fried rice but a related preparation worth knowing. The seafood (shrimp, clams, squid) is simmered in dashi, soy, mirin, and sake, then mixed with freshly cooked rice so the rice absorbs the cooking liquid. It’s cooked once rather than twice, producing a completely different texture — moist, slightly sticky, deeply savory — with a more subtle seafood flavor than the wok version.
Variation 4 — Caribbean-Influenced Seafood Rice
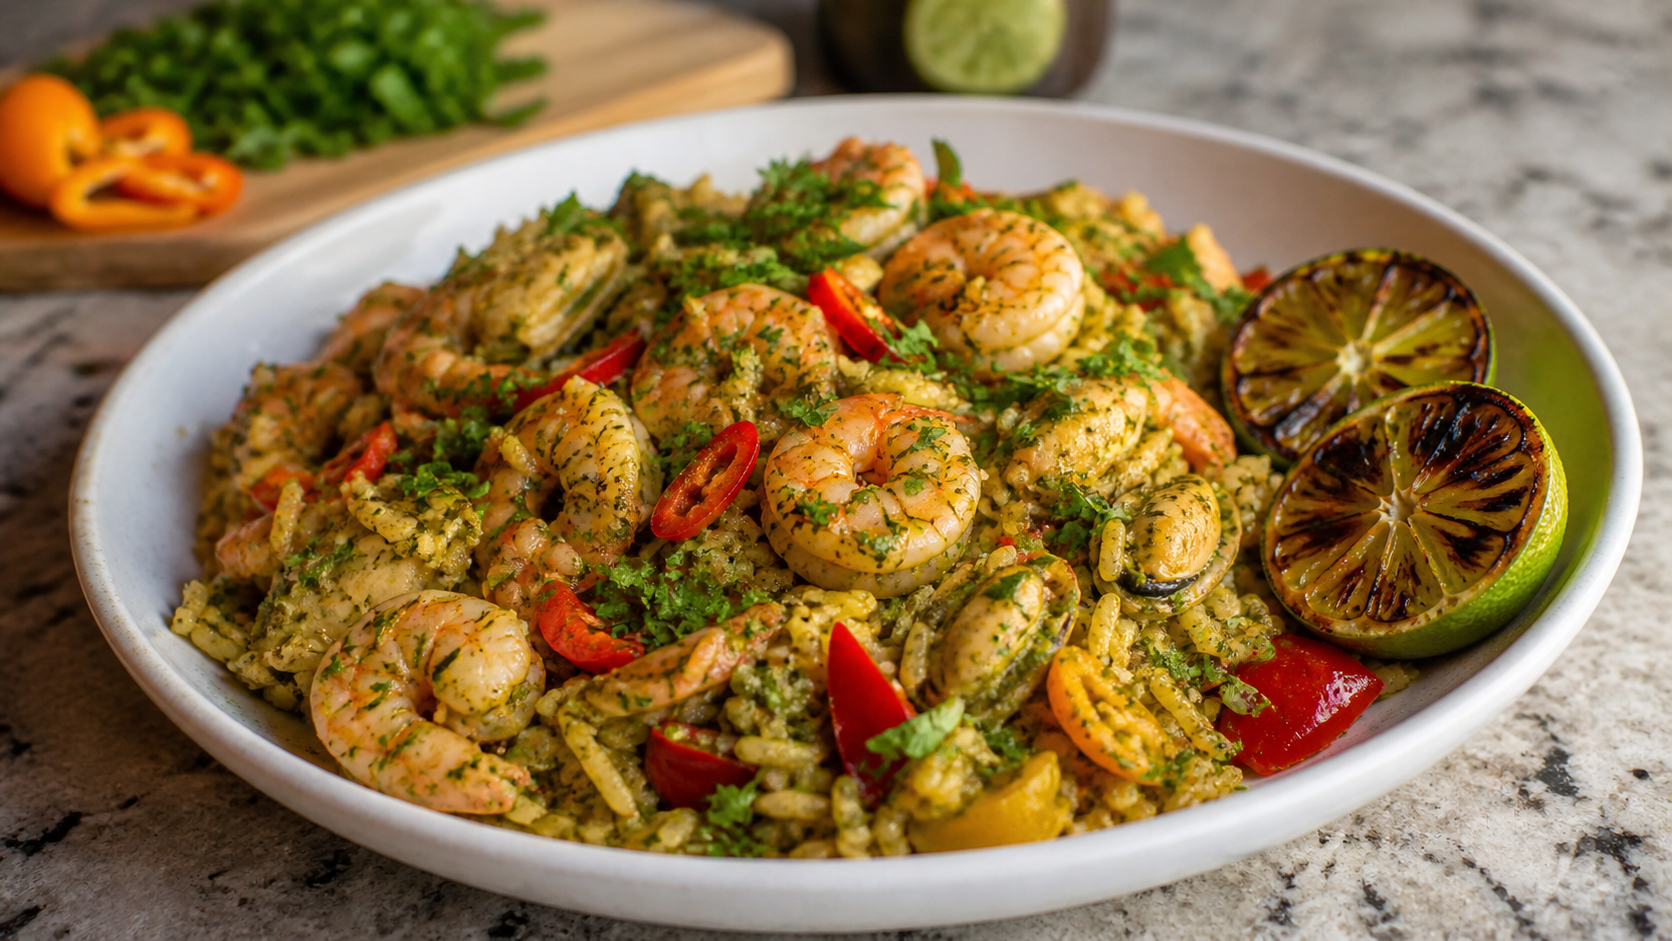
Add green seasoning (a sofrito-style blend of fresh herbs and aromatics used throughout Caribbean and Latin American cooking) alongside or instead of the standard ginger-garlic base. Use bell peppers, scotch bonnet or habanero chili, and finish with grilled lime halves (placed cut-side down on the dry wok for 2 minutes until charred). This variation brings a brightness and aromatic complexity that makes an immediately distinguishable version of the dish.
Nutrition — What a Serving of Seafood Fried Rice Delivers
A properly made seafood fried rice recipe with shrimp, scallops, and crab offers a better nutritional profile than most people assume for a fried dish.
Per serving (approximately 400g, made with the recipe above — serves 4):
Nutrient |
Amount |
Notes |
| Calories | ~420–480 kcal | Varies with oil quantity |
| Protein | 32–38g | From seafood and eggs combined |
| Carbohydrates | 45–50g | Primarily from rice |
| Total Fat | 12–16g | From cooking oil, eggs, sesame oil |
| Saturated Fat | 2–3g | Relatively low |
| Dietary Fiber | 3–4g | From vegetables |
| Sodium | 800–1,100mg | From soy sauce — highest variable |
| Omega-3 (EPA+DHA) | ~400–600mg | From shrimp, scallops, crab |
| Selenium | ~65% DV | Seafood-concentrated micronutrient |
| Vitamin B12 | ~120% DV | Shrimp and crab combined |
| Zinc | ~25% DV | From shellfish |
| Iron | ~15% DV | From shrimp and enriched rice |
Protein quality: The combination of seafood and eggs in fried rice creates a complete protein profile with all nine essential amino acids. The 32–38g of protein per serving makes this a legitimately protein-dense meal rather than a carbohydrate-forward dish.
Sodium management: The highest variable in this recipe is sodium from soy sauce. Three tablespoons of light soy sauce contributes approximately 750–900mg of sodium to the entire dish — roughly 190–225mg per serving when divided four ways. Using low-sodium soy sauce cuts this by 40% without significantly changing the flavor. Adding tamari (gluten-free soy sauce) is another option that often runs lower in sodium than standard soy sauce.
Omega-3 content: The shrimp, scallops, and crab in this recipe collectively contribute a meaningful amount of EPA and DHA omega-3 fatty acids per serving — supporting cardiovascular health, brain function, and anti-inflammatory response. This is one of the nutritional advantages of shellfish-based fried rice over chicken or pork fried rice, which contain minimal omega-3 content.
Rice and the glycemic index: White jasmine rice has a moderately high glycemic index. The fat and protein in this dish — from the oil, eggs, and seafood — slow carbohydrate absorption significantly. Whole-meal for glycemic response, this recipe behaves more like a balanced meal than a pure starch dish. Substituting brown rice reduces the glycemic index further while adding dietary fiber and magnesium.
The oil choice matters: Peanut oil is traditional and has a high smoke point (450°F), making it suitable for wok cooking. It adds a light, neutral flavor. Avocado oil works at similar temperatures with a truly neutral taste. Vegetable, canola, and refined coconut oil are all acceptable. Extra virgin olive oil should not be used for wok cooking — its smoke point is too low and its flavor compounds degrade at wok temperatures.
Storage, Reheating, and Make-Ahead Strategy
Storage: Seafood fried rice keeps well refrigerated in an airtight container for 2–3 days. The rice quality is best on day one; by day two, the rice is softer but still satisfactory. Do not leave at room temperature for more than 2 hours — cooked rice with shellfish is a food safety priority.
Reheating: A wok or skillet over medium-high heat with a small splash of oil is far superior to the microwave for fried rice reheating. The skillet method re-crisps the rice surface and prevents the rubbery texture that microwave reheating produces in shellfish. Add shrimp and scallops to the pan last — 60 seconds is enough to bring them to serving temperature from refrigerated. If you must use the microwave, use 50% power in 60-second intervals and cover with a damp paper towel to trap steam.
Make-ahead components:
- Day-old rice: prepare 1–2 days in advance and refrigerate
- Minced garlic and ginger: prep the morning of and store in small containers
- Diced vegetables: prep and refrigerate up to 24 hours ahead
- Sauce: mix and store in a small jar up to 1 week refrigerated
Do not pre-cook the seafood in advance and reheat it during the fried rice process — this produces the overcooked, tight texture everyone associates with disappointing homemade fried rice. Cook the seafood fresh, even if everything else is prepped ahead.
Frequently Asked Questions — Seafood Fried Rice Recipe
Q: What seafood works best in a seafood fried rice recipe? Shrimp is the most reliable base protein — it cooks quickly, holds its texture under high heat, and pairs well with the soy and sesame sauce profile. Scallops add sweetness and an upscale texture. Lump crab meat (folded in at the end) adds flavor without requiring additional cooking. Squid works well when tenderized first with a brief baking soda treatment. Avoid fish fillets — they break apart during wok tossing and produce a flaky, uneven texture.
Q: Can I use frozen shrimp for seafood fried rice? Yes — frozen shrimp is used in most restaurant kitchens for fried rice. Thaw completely, pat dry with paper towels twice, and proceed. The critical step is moisture removal — insufficiently dried thawed shrimp will steam rather than sear and will make the rice wet.
Q: Why does my fried rice always turn out mushy? Three common causes: fresh rice (should be day-old), too much moisture on the seafood or vegetables (pat everything dry), and overcrowding the wok (cook in batches if needed). Mushy fried rice is almost always a moisture-management failure rather than a seasoning or technique issue.
Q: What is wok hei and can I achieve it at home? Wok hei is the smoky, slightly charred, complex flavor that comes from the ultra-high heat of a restaurant wok burner interacting with the ingredients. Home stoves can approximate it by preheating the wok for 3–4 minutes, cooking in small batches, and using peanut or avocado oil with a high smoke point. An outdoor gas burner or flat-top griddle achieves better wok hei results than most indoor home stoves.
Q: Do I need a wok to make seafood fried rice? No. A large cast iron skillet or heavy stainless skillet works well, particularly if preheated thoroughly. The wok’s sloped sides make tossing easier, but the cooking surface temperature is what matters most. A large skillet on maximum heat can match a wok for browning quality — just cook in smaller batches.
Q: How do I prevent shrimp from becoming rubbery in fried rice? Cook the shrimp separately first to just-cooked (pink, C-shape, slightly underdone at center) and set aside. Return to the wok in the final 60–90 seconds only to warm through. Shrimp that cook for the full duration of the fried rice process will always be overcooked.
Q: What soy sauce should I use for seafood fried rice? Light soy sauce for the primary seasoning (it has stronger flavor than regular or dark soy sauce). A small amount of dark soy sauce for color depth — it’s less salty but produces the golden-brown color characteristic of good fried rice. Oyster sauce for umami richness. Low-sodium versions of all three are available and recommended for people managing sodium intake.
Q: Can I add noodles instead of rice? Yes — this becomes a variation closer to chow mein or lo mein. Use pre-cooked, cooled noodles (same moisture logic as day-old rice) and follow the same stir-fry technique. Rice vermicelli, ramen noodles, and udon all work with this seafood and sauce combination.
Conclusion — The Details That Make the Difference
A great seafood fried rice recipe is the sum of several small technical decisions that individually seem minor but collectively determine whether the dish is restaurant-quality or merely adequate. Day-old rice, separately cooked seafood, a thoroughly preheated wok, dry protein surfaces, and sesame oil added off-heat are not optional suggestions — they’re the mechanism behind the result.
The nutritional profile of this dish holds up well: 32–38g of protein per serving from seafood and eggs, meaningful omega-3 content from the shellfish, selenium and B12 at or above daily requirements, and moderate calories when portion and oil are managed. Reducing soy sauce sodium is the most impactful nutritional adjustment you can make without changing the character of the dish.
Master the day-old rice and the separate-seafood technique, and the rest becomes refinement. From there, regional variations — Thai basil, Singapore black pepper, Caribbean green seasoning — give the same technical foundation infinite flavor range.