How to Cook Seafood Properly — The Complete Technique, Temperature, and Safety Guide
How to Cook Seafood Properly — Everything From Temperature Science to Technique Mastery
The two biggest problems in seafood cooking are lack of freshness and overcooking — and of the two, overcooking is the one home cooks commit more consistently. It happens because seafood operates on a fundamentally shorter cooking timeline than land proteins, its doneness signals are subtle, and most recipes give time ranges that are either too long or insufficiently specific for the cut, thickness, and species being cooked.
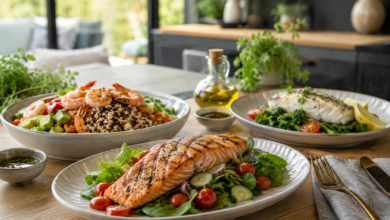
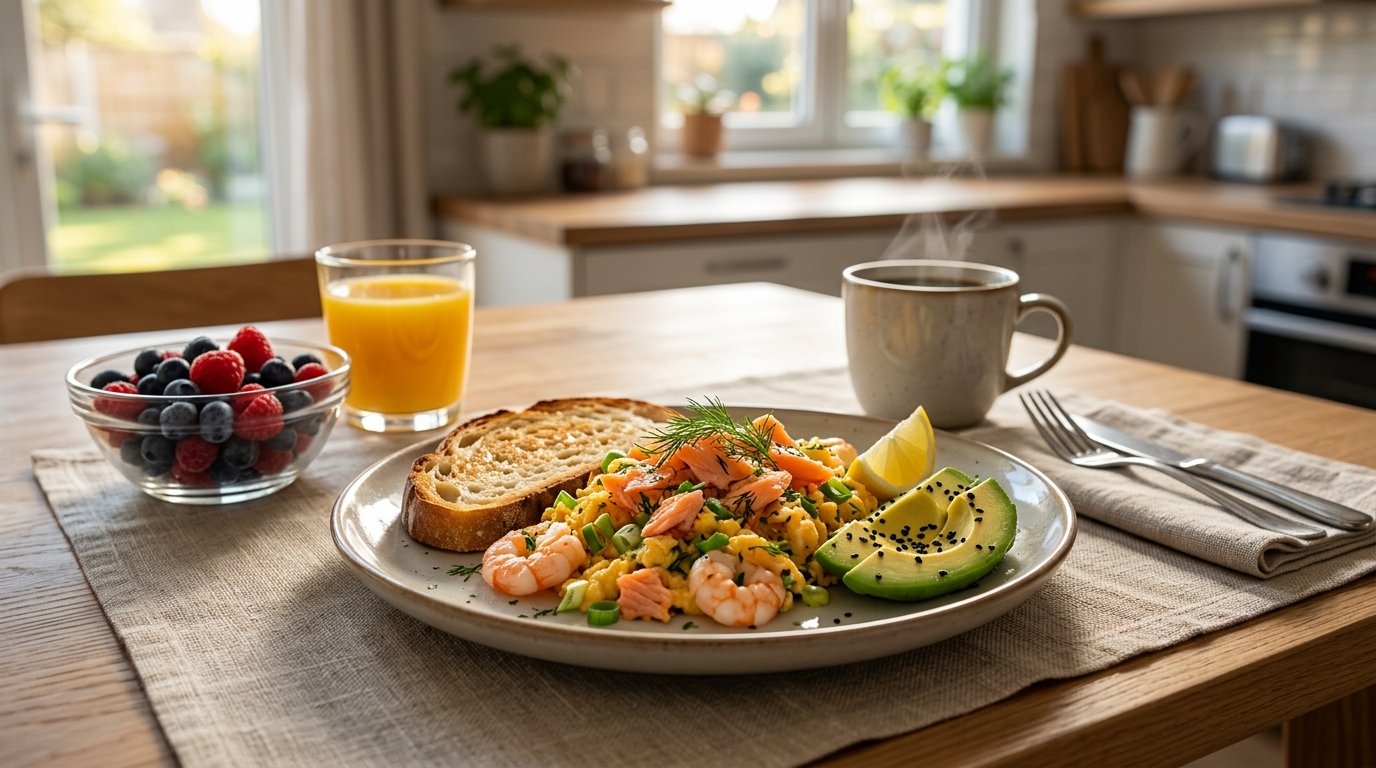
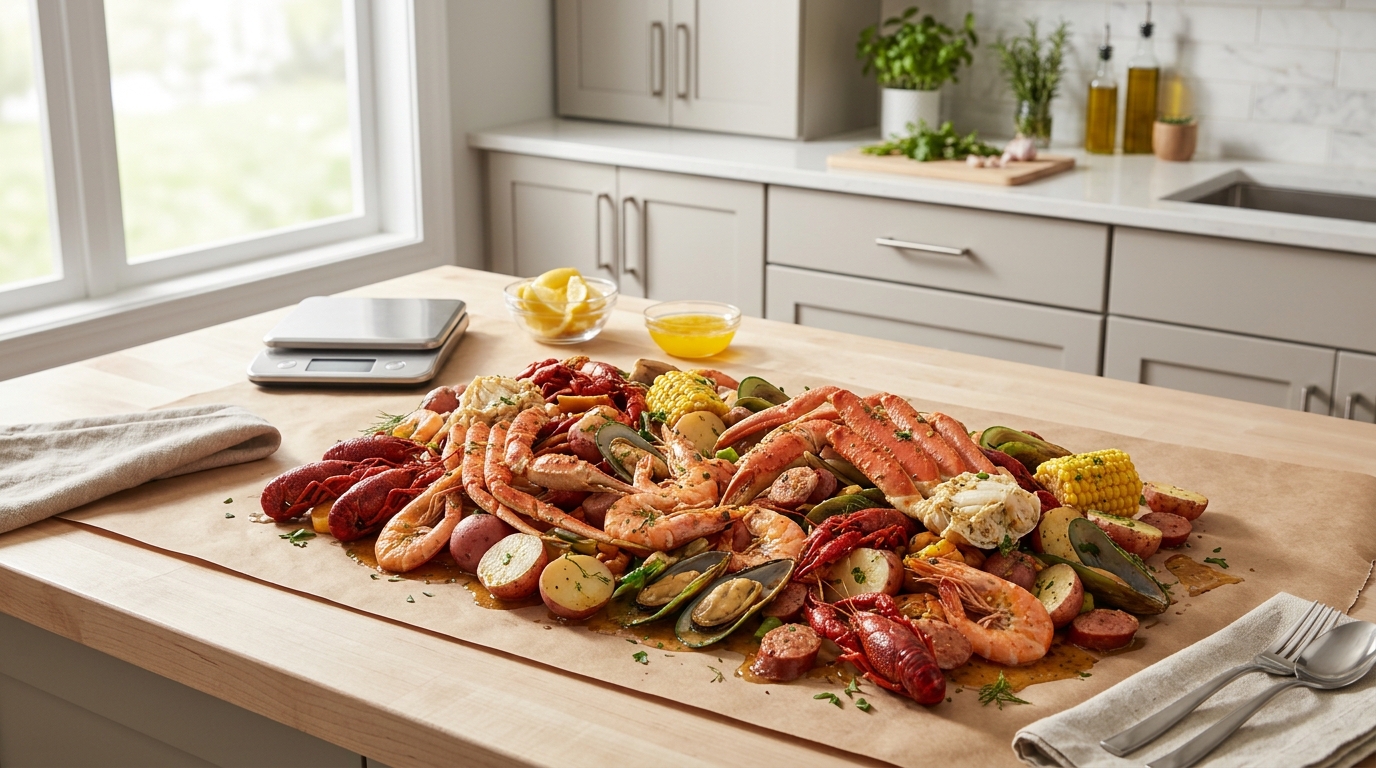
Learning how to cook seafood properly means understanding three things simultaneously: the internal temperatures that define doneness and safety, the visual and tactile cues that tell you when you’re there without a thermometer, and the specific techniques that match each protein type. This guide covers all three — across fish fillets, shrimp, scallops, lobster, crab, clams, mussels, and oysters — plus the food safety framework and nutrition context that make the difference between confident seafood cooking and guesswork.
Why Seafood Cooks Differently — The Biology That Explains Everything
Understanding the structural difference between seafood and land animal protein makes every other technique in this guide make more sense.
Muscle fibers in fish are constructed of very short bundles — up to ten times shorter than the long muscle fibers in beef, pork, or chicken. Fish muscle also contains only a small fraction of the connective tissue that land animals carry, and what connective tissue does exist sits in very thin sheets rather than dense bands. The practical result: fish proteins denature (firm and restructure) quickly and completely at lower temperatures, with essentially no collagen matrix to keep them moist the way a beef braise does.
Salmon has almost no collagen — this means it loses moisture more quickly than beef when heated. Once fish proteins pass their doneness temperature by even a few degrees, the moisture they were holding is gone. There’s no “resting” that brings it back. This is why the difference between perfectly cooked salmon and overcooked salmon is often 30 seconds or less at high heat.
Shellfish have more connective tissue than finfish, which is why shrimp and scallops can withstand high-heat searing better than cod or sole. But that connective tissue also becomes tough and rubbery when overcooked — the mechanism is different from fish but the result is equally unforgiving. The constriction of shrimp — tightening into a tight O-shape rather than a gentle C-shape — is a visual tell of overcooked shellfish caused by excessive protein cross-linking at high temperature.
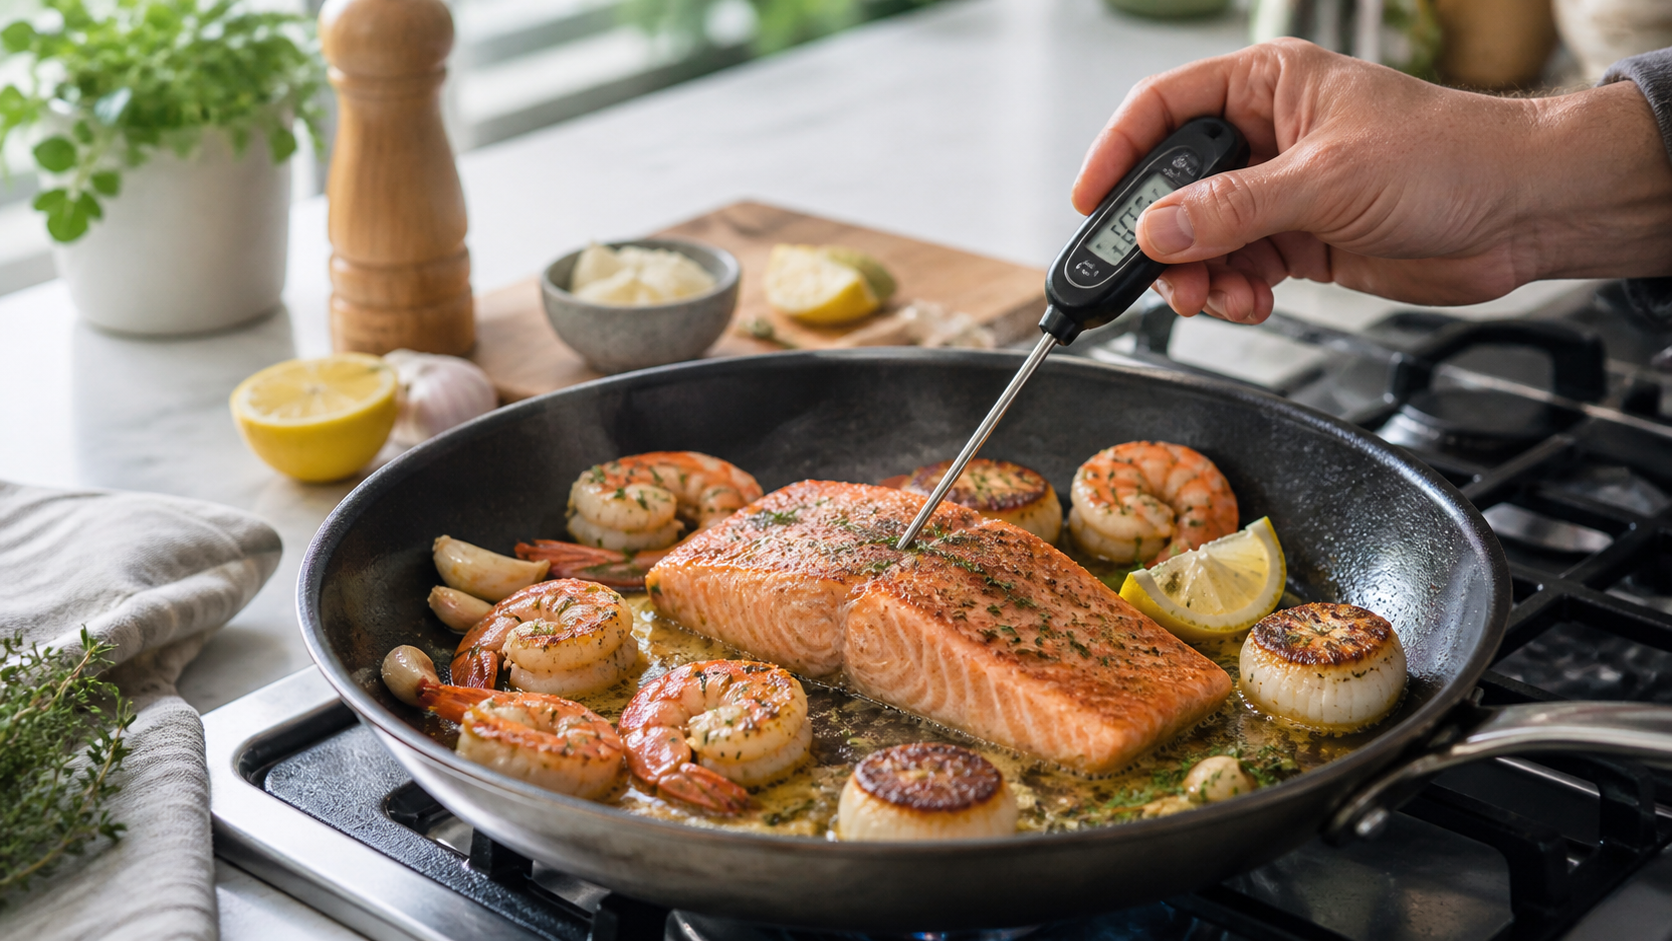
The carryover principle: Seafood continues cooking from residual heat after being removed from the heat source. A scallop pulled at 115°F will rise 10–15°F from carryover before you serve it. This is not a minor consideration — it means the pull temperature for most seafood is lower than the target serving temperature, and cooking to the serving temperature before removing from heat guarantees overcooking.
The Master Temperature Reference — Every Seafood Type
The FDA recommends cooking all seafood to an internal temperature of 145°F (63°C) to kill harmful bacteria and parasites. However, the optimal eating temperatures for many seafood types are lower than 145°F — a gap that creates the central tension in seafood cookery between official safety guidelines and culinary quality.
Complete internal temperature reference:
Seafood |
FDA Safe Temp |
Chef’s Pull Temp |
Final Serving Temp |
Visual Doneness |
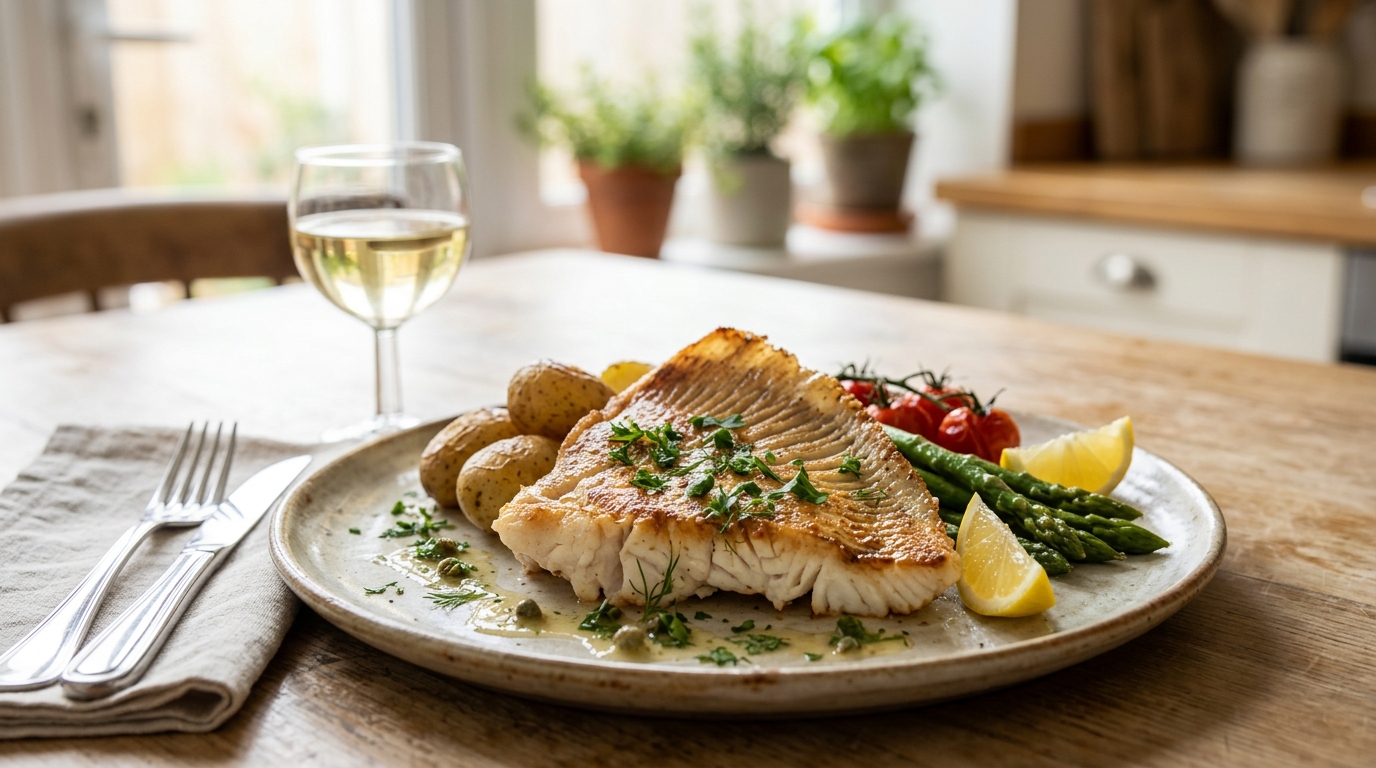
| Fish fillets (salmon, cod, halibut) | 145°F | 125–130°F | 130–135°F | Opaque, flakes with gentle pressure |
| Tuna steaks | 145°F | 115–120°F (rare) | 115–125°F | Seared exterior, pink-red center |
| Shrimp | 145°F | 120°F | 135–140°F | Pink, C-shaped curl, opaque |
| Scallops | 145°F | 115°F | 125–130°F | Golden sear, milky white interior |
| Lobster (tail) | 145°F | 135°F | 140°F | Opaque white, shell red |
| Lobster (claws) | 145°F | 145°F | 150°F | Fully opaque, firm |
| Crab legs | 145°F | 130°F | 135°F | Opaque white, heated through |
| Clams and mussels | 145°F | Until shells open | N/A | Shells fully open |
| Oysters (cooked) | 145°F | Until gaping + 3–5 min | N/A | Plump, edges curled |
The FDA safety vs. culinary quality gap: The USDA recommends cooking fish to 145°F for safe eating, however some chefs and home cooks pull salmon off the heat at 125°F for a moist, tender texture. This 20-degree gap explains why restaurant salmon tastes different from home-cooked versions. For healthy adults, the lower pull temperature is an acceptable culinary choice with high-quality fresh fish. For high-risk groups — pregnant women, elderly individuals, immunocompromised people, and children — the FDA’s 145°F guideline should be followed strictly.
Tuna is the exception: Tuna is a versatile fish commonly enjoyed rare or medium-rare due to its firm texture and rich flavor. Because it loses moisture so rapidly, tuna steaks are often seared to 115°F or under. For this reason, choose high-quality sushi-grade fish that has been flash-frozen immediately after being caught to reduce the risk of foodborne illnesses.
Selecting Fresh Seafood — Before You Even Start Cooking
No cooking technique compensates for poor-quality seafood. Selecting properly is the first act of cooking seafood properly.
For whole fish:
- Eyes should be clear and slightly bulging — not cloudy, sunken, or dry
- Gills should be bright red, not brown or gray
- Flesh should feel firm and spring back when pressed — not leave a depression
- Smell should be clean and oceanic — not sharp, ammonia-like, or “fishy”
For fillets and steaks:
- Flesh color should be vibrant and consistent — translucent for white fish, bright pink-orange for salmon
- Surface should look moist but not wet or slimy
- Cut edges should appear clean and defined, not soft or ragged
- No browning or discoloration along the bloodline
For shrimp:
- Shells should be intact and firm
- Flesh should be firm, moist, and translucent
- Smell should be mild and briny — not like ammonia
For bivalves (clams, mussels, oysters):
- Shells must be closed or snap shut immediately when tapped — open shells that don’t respond indicate dead shellfish that are not safe to eat
- Shells should be intact, not cracked or broken
- Should feel heavy for their size — hollow shells indicate the organism has died and dried out
The “sushi-grade” distinction: This term has no legal standard in the United States. It indicates that the fish was frozen to -4°F (-20°C) for at least 7 days (or -31°F for 15 hours) to kill parasites — the FDA-required process for fish served raw. For home cooking applications at doneness, sushi-grade doesn’t change the cooking requirements. For raw preparations, it is the minimum threshold.
How to Cook Fish Fillets Properly — Four Core Methods
Method 1 — Pan-Searing (Best for Salmon, Halibut, Sea Bass, Cod)
The most reliable method for skin-on fillets with a proper crust.
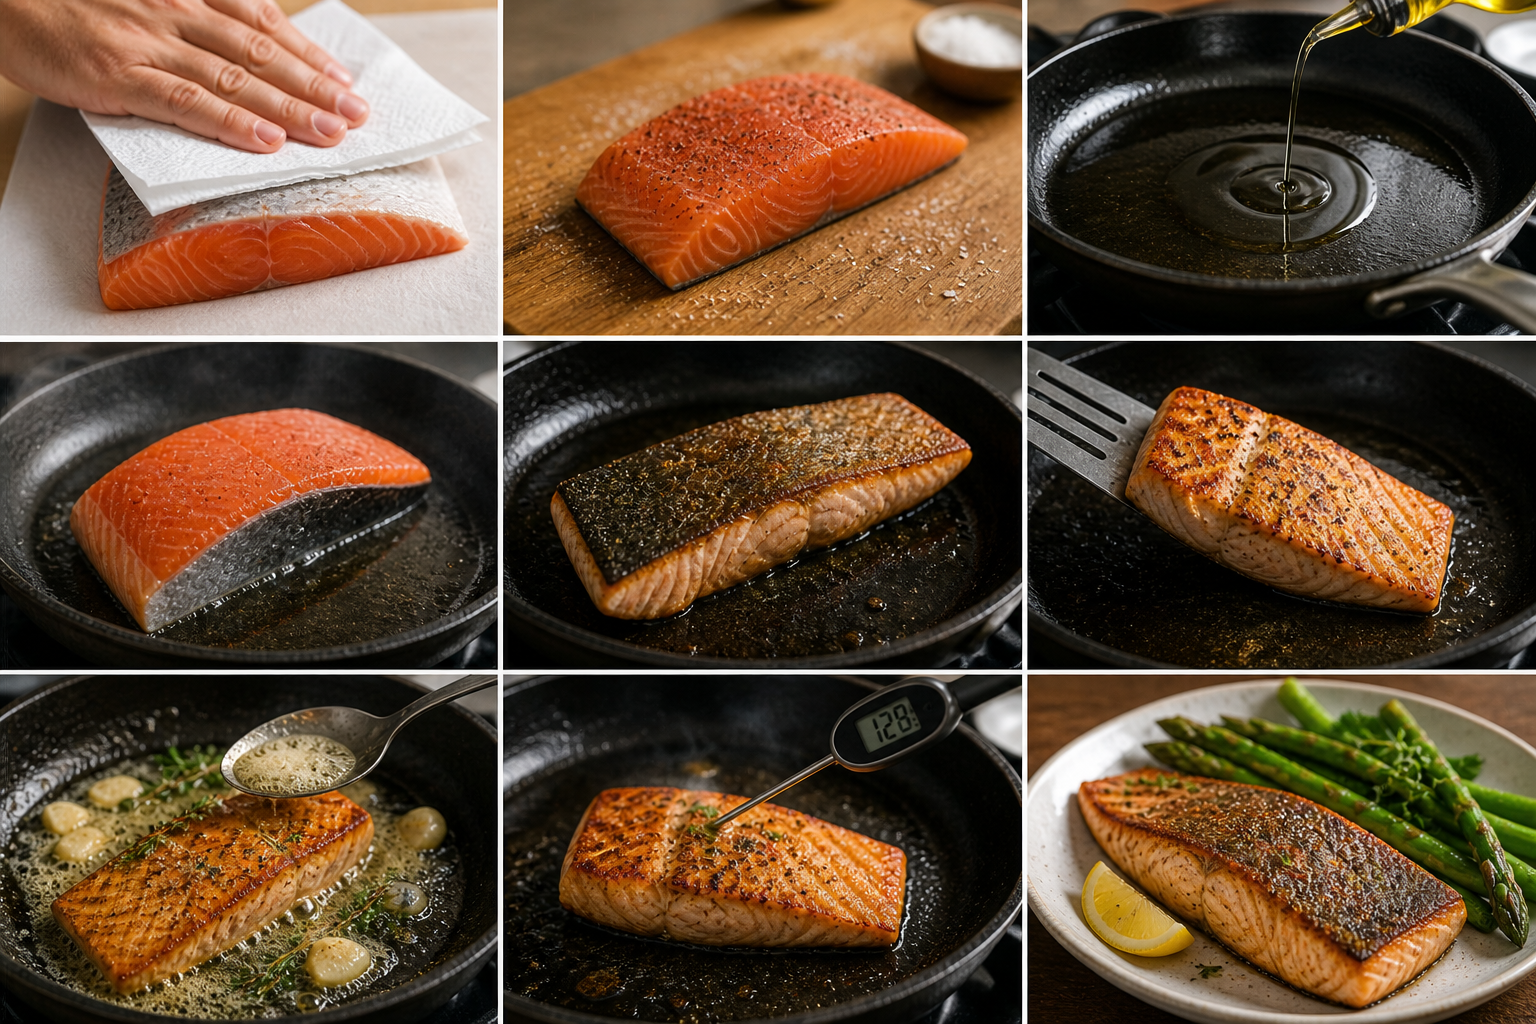
- Pat the fillet completely dry with paper towels. Moisture on the surface creates steam and prevents the Maillard browning that makes pan-seared fish satisfying.
- Season with salt 10–15 minutes before cooking and allow to rest at room temperature. Salt the fish and allow it to rest 15–30 minutes to draw out excess moisture. Pat the fish dry with a towel to remove excess surface moisture and oil the fish.
- Heat a stainless or cast iron skillet over medium-high heat until very hot. Add high smoke-point oil (avocado, grapeseed, or refined coconut).
- Place fillet skin-side down. Press gently for 10 seconds to prevent curling. Cook 60–70% of the way through on the skin side — 4–5 minutes for a 1-inch fillet.
- Flip once. Cook 1–2 minutes on the flesh side. Add butter and baste.
- Pull at 125–130°F internal and rest 2 minutes. Carryover will bring it to 130–135°F.
The 10-minute rule as a starting point: Cook fish for 10 minutes per inch of thickness, measuring at the thickest point. This is a rough guide only — thinner fillets cook faster proportionally and the rule doesn’t account for heat intensity or starting temperature. Use it as a timer to begin checking, not as a final judgment.
Method 2 — Baking or Roasting (Best for Whole Fish, Thick Fillets)
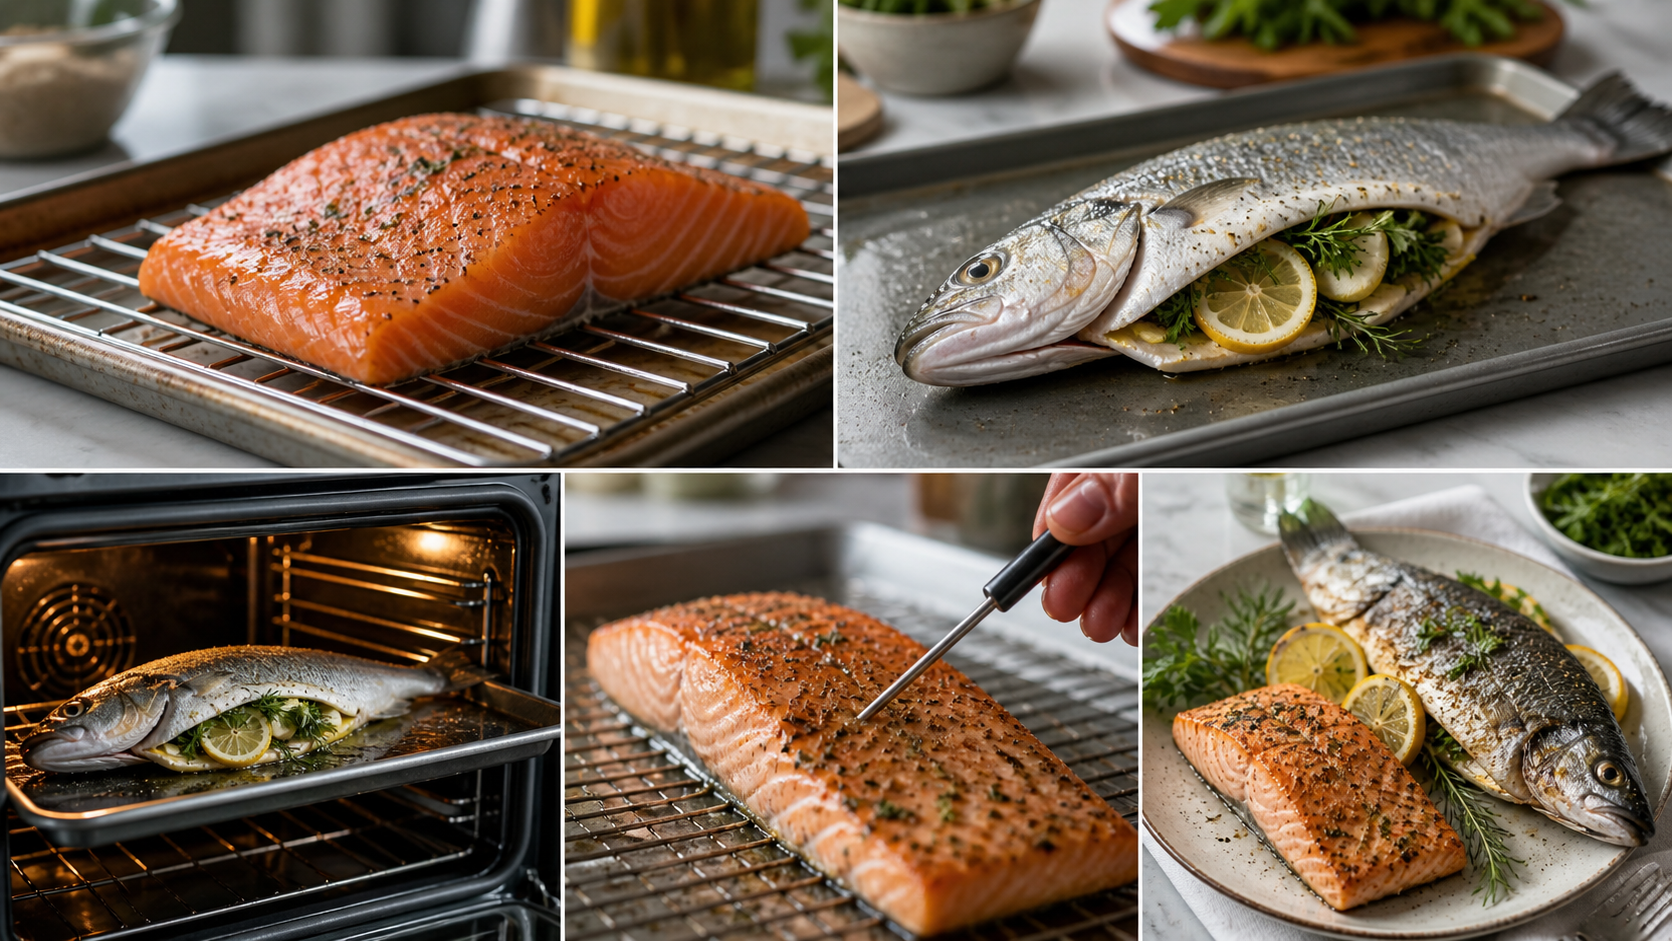
If baking, cook at 450°F. Place the fillet on a wire rack over a sheet pan for even heat circulation rather than a flat baking dish where the bottom steams. For whole fish, stuff the cavity with aromatic herbs and citrus to add internal moisture and prevent the interior drying before the exterior reaches doneness.
For a 1-inch salmon fillet at 425°F, expect 12–15 minutes. For a whole 2-lb branzino, expect 25–30 minutes at 400°F. Always verify with a thermometer — ovens vary significantly.
Method 3 — Grilling (Best for Firm Fish, Tuna, Swordfish)
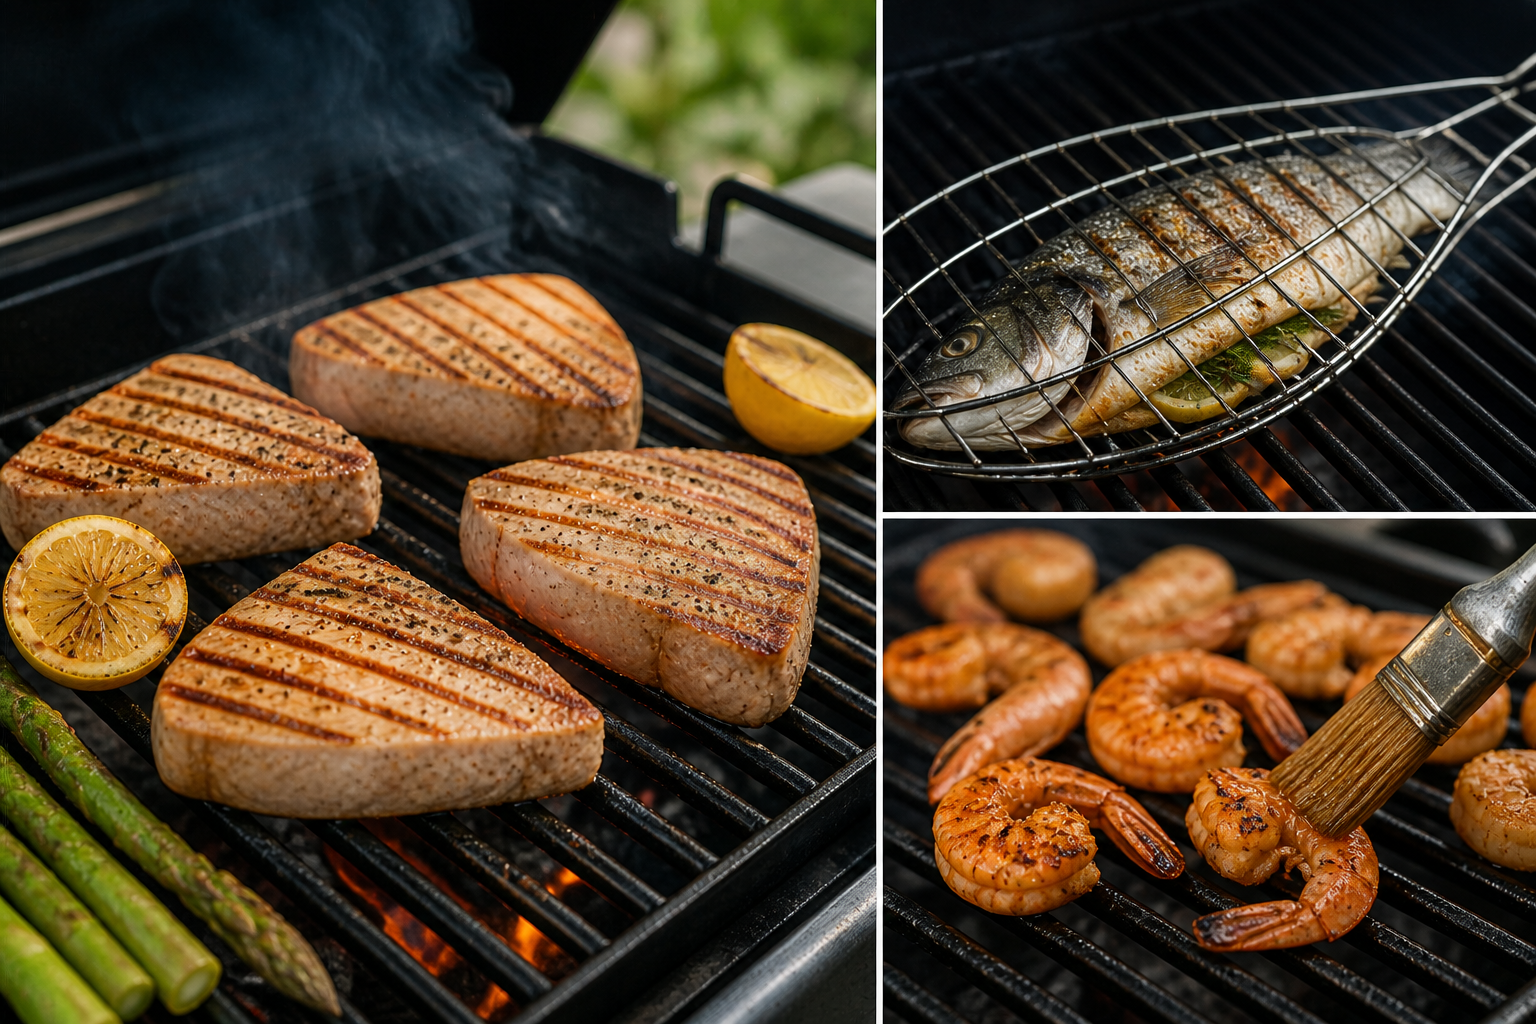
Use firm fish and shellfish that can hold up to the heat and won’t fall apart once on the grill. Grill baskets can be used for delicate fillets or whole fish to ease the turning process.
Oil the grates and the fish before grilling — not the grates alone. The fish needs direct oil contact to prevent sticking. Grill at slightly lower temperature than meat — around 375–400°F rather than maximum heat, which chars the exterior before the interior reaches temperature. Tuna and swordfish work at higher heat because their dense flesh can handle searing that would destroy more delicate fish.
Method 4 — Poaching (Best for Delicate Fish, Cod, Halibut)
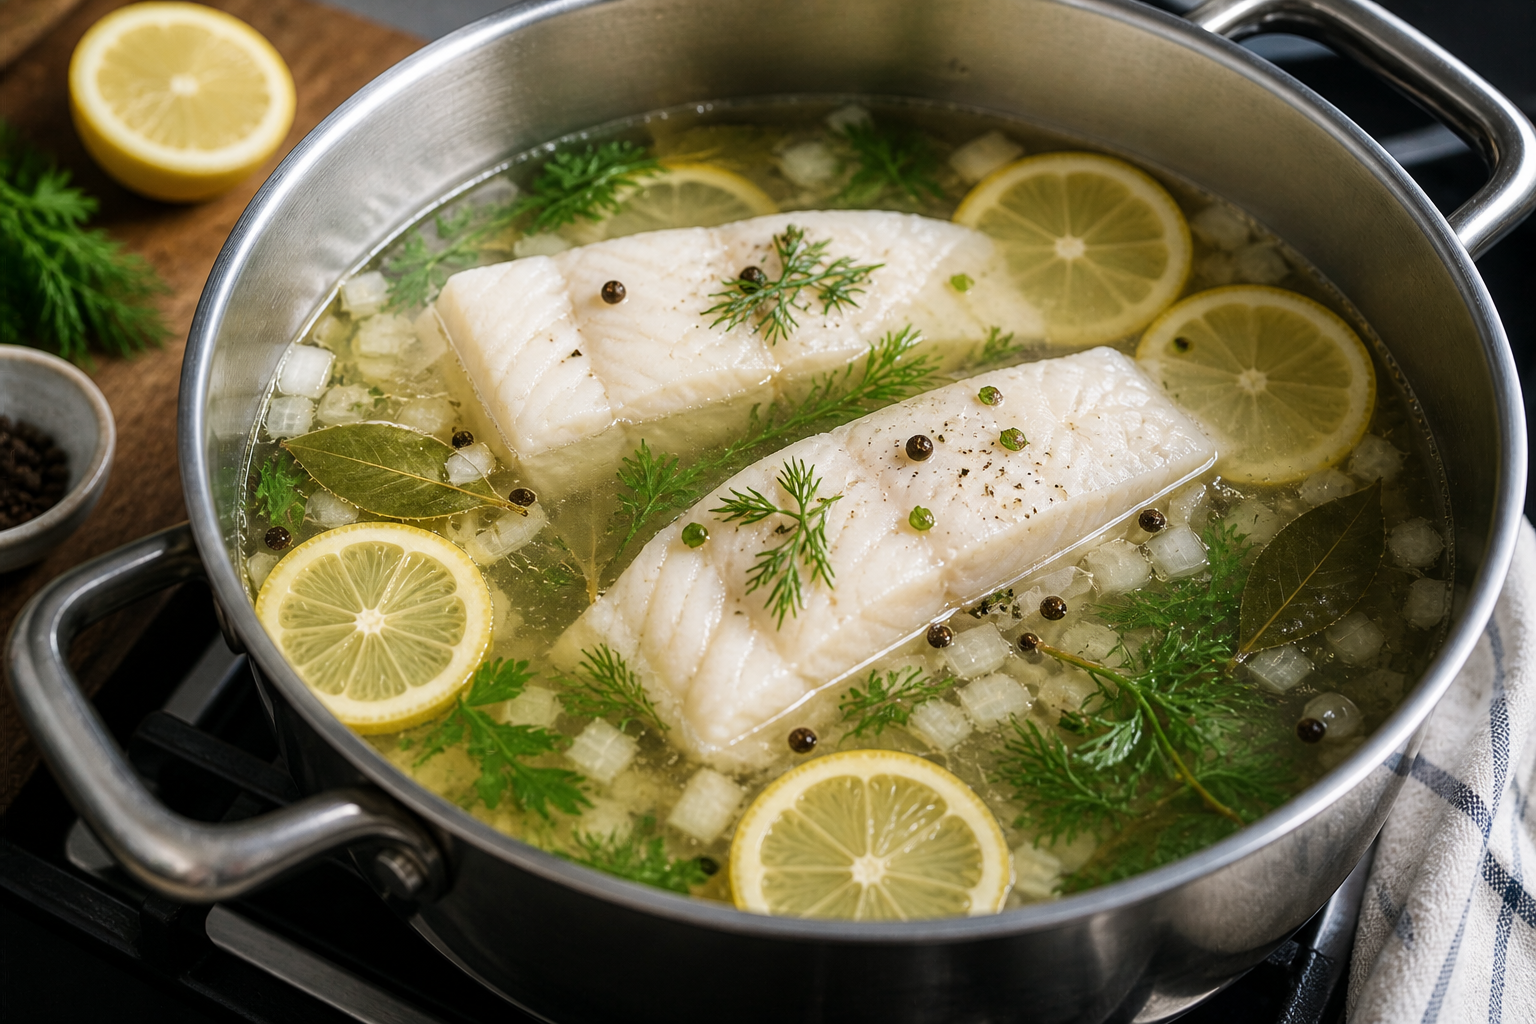
Boiling is a crude method that can overcook and damage delicate textures of fish and seafood, but simmering is a more gentle approach that preserves quality and the temperature is much easier to control.
Poach in simmering (not boiling) liquid at 160–180°F — the liquid should barely be moving. A court-bouillon (water with white wine, lemon, bay leaf, peppercorns, and aromatics) produces better flavor than plain water. Poaching takes longer than pan-searing but produces exceptionally moist, delicate results that are ideal for anyone cooking for high-risk individuals where food safety is paramount.
How to Cook Shrimp Properly — The C vs. O Problem Solved
Shrimp is the protein most people overcook, most consistently — because the visual cues are easy to misread and the cooking window is very short.
Look for a change in color (light pink) and an internal temperature in the shrimp of 135–140°F to tell you when your shrimp are ready to come off the heat. Constriction is the tell-tale sign that you’ve overcooked your shrimp. The longer you cook them, the tighter and tougher they will get.
The C vs. O visual guide:
- Undercooked: Translucent blue-gray, mostly straight
- Perfectly cooked: Pink throughout, opaque, gentle C-shape — the two ends don’t touch
- Overcooked: Tight O-shape — the tail curls to meet the head
The correct pan-searing method for shrimp:
- Pat dry, season with salt
- Heat skillet to high — the pan should be smoking
- Add shrimp in a single layer — never crowd
- Cook undisturbed 60–90 seconds until pink on the bottom
- Flip once. Cook 60 seconds more
- Remove immediately — residual heat continues cooking them on the plate
Total cook time for large (21–25 count) shrimp: 2–3 minutes. For jumbo (16–20 count): 3–4 minutes. Never trust recipe timing alone — watch the shrimp. The moment they’re pink throughout and C-shaped, pull them.
The cold start technique for larger shrimp: For very large shrimp (U-12 or U-10 count), starting in a cold pan with butter over medium heat and gradually increasing temperature produces more even cooking than high-heat searing. The slower heat allows the interior to cook through without the exterior tightening into rubber before the center reaches temperature.
How to Cook Scallops Properly — The Dry Surface Rule
Scallops are the most technique-dependent shellfish. The margin between a perfect golden sear and a steamed, pale, rubber disc is entirely a function of surface moisture management.
The ideal internal temperature for scallops to achieve that melt-in-your-mouth texture is 125–130°F; however, this will not kill potentially harmful bacteria. Scallops should reach 145°F to be deemed safe to consume.
The dry scallop vs. wet scallop distinction: Most commercially available scallops are “wet” — treated with sodium tripolyphosphate (STP), which allows them to absorb water and appear plumper (increasing their weight by up to 25%). Wet scallops are visually opaque and white even when raw; they release significant water when heated, making browning essentially impossible. Dry scallops are untreated, appear slightly beige or tan when raw, and sear properly because they don’t carry excess water.
If your scallops release a pool of liquid in the pan immediately upon contact, they are wet scallops. The fix is to salt them and press them between paper towels for 10 minutes before cooking.
The proper searing method:
- Pat scallops completely dry — this step cannot be overstated
- Season with salt on one side only — 5 minutes before cooking
- Heat a stainless or cast iron skillet to high until smoking
- Add 1 tablespoon neutral oil plus 1 tablespoon butter at the last moment
- Place scallops flat side down — do not touch for 90–120 seconds
- The scallop should release from the pan when the sear is complete — if it sticks, it isn’t ready to flip
- Flip once. Cook 45–60 seconds
- Scallops should be cooked to an internal temperature of 115°F and removed from heat. Due to their size and the high heat used to cook scallops, carryover cooking will add an additional 10–15°F.
Clams, Mussels, and Oysters — The Shell-Open Doneness Indicator
Bivalves are the only seafood where doneness is primarily determined not by temperature but by a physical change in the organism — the opening of the shell.
The rule for all bivalves: Cook until the shells open fully. Discard any that remain closed after cooking — they’re dead and potentially dangerous. A closed shell after full cooking time indicates the organism was already dead before cooking and the shell mechanism has seized — it is not safe to pry open and eat.
Timing reference:
- Clams: Steam 4–9 minutes until shells open; discard any closed after 10 minutes
- Mussels: Steam 5–7 minutes; discard closed
- The FDA recommends that in-shell oysters be steamed four to nine minutes or broiled three to five minutes after gaping.
Do not overcook bivalves after they open. The moment a mussel or clam shell opens, the meat is at or near doneness. Continuing to boil or steam past this point produces tough, shrunken, rubbery meat. Remove the pot from heat as soon as the majority of shells are open, and let the residual steam finish the few laggards for 1–2 more minutes before discarding any still closed.
Live storage before cooking: Live clams, mussels, and oysters must be stored in a way that allows them to breathe — never in a sealed plastic bag submerged in water (this kills them). Store in the refrigerator in a colander covered with a damp towel or in a mesh bag. Use within 1–2 days of purchase.
Nutrition — What Properly Cooked Seafood Delivers
Seafood is among the most nutritionally dense proteins available, and cooking it properly preserves significantly more of its nutritional value than overcooking does.
Per 3.5 oz (100g) serving of common seafood, cooked (USDA data):
Seafood |
Calories |
Protein |
Fat |
Key Nutrients |
| Salmon | 206 kcal | 22g | 13g | DHA/EPA omega-3 (~2.2g), B12 (117% DV), vitamin D (66% DV), selenium |
| Shrimp | 99 kcal | 24g | 0.3g | Selenium (78% DV), B12, iodine, zinc |
| Scallops | 88 kcal | 17g | 0.8g | B12, magnesium, potassium, phosphorus |
| Cod | 82 kcal | 18g | 0.7g | B12, selenium, phosphorus — very lean |
| Clams | 74 kcal | 13g | 1g | Iron (132% DV), B12 (3,500% DV), selenium, zinc |
| Mussels | 86 kcal | 12g | 2.2g | B12 (340% DV), iron, manganese, selenium |
| Lobster | 90 kcal | 19g | 0.6g | Copper (198% DV), selenium, zinc, phosphorus |
What overcooking costs nutritionally: Overcooked fish releases more moisture through protein contraction, which carries water-soluble B vitamins (B12, niacin, B6) and some minerals into the pan liquid or drip pan. The loss is not catastrophic — most heat-stable micronutrients remain — but the practical difference between a moist, properly cooked salmon fillet and an overcooked one includes measurable differences in B vitamin retention. Omega-3 fatty acids are relatively heat-stable but degrade faster at very high temperatures — another reason to cook seafood at moderate to medium-high heat rather than maximum heat.
Clams deserve special mention: A single 3.5 oz serving of cooked clams delivers 3,500% of the daily value for vitamin B12 — the single highest B12 concentration of any commonly eaten food. People managing B12 concerns, including older adults and anyone on plant-reduced diets, have access to an extraordinary B12 source in clams if they’re willing to cook them.
Frequently Asked Questions About Cooking Seafood Properly
Q: What is the most important rule for cooking seafood properly? Don’t overcook it. Seafood proteins denature faster and at lower temperatures than land animal proteins, with no collagen matrix to retain moisture under extended heat. The difference between perfectly cooked and overcooked seafood is often seconds at high heat. Use a thermometer, learn the visual cues, and always pull from heat slightly before the target temperature to allow carryover cooking to finish the job.
Q: How do I know when fish is done without a thermometer? The fork-flake test: insert a fork at 45 degrees into the thickest part and twist gently. Properly cooked fish separates into flakes easily and looks opaque throughout. Undercooked fish resists flaking and looks shiny or translucent in the center. Overcooked fish falls apart before you apply pressure. For shrimp and scallops, the C-shape and color change to pink/opaque are the primary visual cues.
Q: Why does my pan-seared fish stick to the pan? Either the pan wasn’t hot enough before adding the fish, the fish wasn’t dry enough, or you tried to move it too soon. Fish releases naturally from a properly heated pan when the sear is complete — if it’s sticking, leave it alone for another 30–60 seconds. This applies to both stainless steel and cast iron. A cold or lukewarm pan creates immediate protein adhesion that doesn’t release cleanly.
Q: What cooking method is best for delicate fish like sole or flounder? Gentle, quick methods: pan-searing at medium heat, gentle poaching in simmering court-bouillon, or baking at moderate temperature (350–375°F). Delicate fish like sole or flounder are well-suited for quick methods like sautéing or pan-searing, while heartier fish like salmon can withstand grilling or baking. High direct heat methods — hot grill, high broil — disintegrate thin delicate fillets before they have time to cook through.
Q: Should I rinse seafood before cooking? Rinse raw seafood under cold, running water to remove bacteria — but immediately and thoroughly pat it dry. Surface moisture is the enemy of browning and proper searing. The brief rinse is a standard professional practice for removing surface impurities; the drying step is what makes the cook successful. Do not rinse fish over other food preparation surfaces without thorough sanitizing immediately after.
Q: How do I cook frozen shrimp properly? Cook directly from frozen for stovetop methods — no thawing required. Add 1–2 minutes to the cook time. For better results, quick-thaw in a colander under cold running water for 5 minutes before cooking — this gives more even results than frozen-to-pan. Never thaw in warm water, which begins cooking the outer layer before the center is ready.
Q: What temperature should I cook lobster to? A 1-pound lobster will take around 7–10 minutes to cook fully. Grilled lobster tails take approximately 6–10 minutes on medium to medium-high heat. The tail is done at 140°F internal — the meat will be fully opaque and white. The shell turns bright red at a lower temperature than the meat reaches doneness, so shell color is not a reliable sole indicator.
Q: Can I marinate seafood overnight? For most seafood, no — and for all seafood, only under refrigeration. Always marinate your seafood under refrigeration, never at room temperature. Overnight marination in acidic liquids (lemon, vinegar, wine) begins denaturing the proteins — essentially “cooking” them in acid, which produces a mushy texture before heat is even applied. 15–30 minutes is sufficient for most fish; up to 2 hours for firm, thick cuts like tuna steaks or whole salmon.
Conclusion — Technique, Temperature, and Timing Work Together
Learning how to cook seafood properly is a skill that builds on three compounding foundations. First, the temperature knowledge — knowing that finfish pulls at 125–130°F, scallops at 115°F, shrimp at 120°F, and bivalves at open shells gives you the target. Second, the visual and tactile cues — C-shape shrimp, opaque flaking fish, released scallops, opened shells — let you confirm doneness when a thermometer isn’t practical. Third, the techniques — the dry surface rule for scallops, the single flip for searing, the simmering distinction from boiling for bivalves, the carryover principle for every protein — are what prevent the most common failures.
Nutritionally, seafood earns its reputation. Salmon’s omega-3 density, clams’ extraordinary B12 content, shrimp’s high-protein-to-calorie ratio, and scallops’ lean protein profile make this food category worth mastering. Overcooking diminishes both the pleasure and the nutritional value — properly cooked seafood retains more moisture-bound B vitamins and provides a significantly better eating experience.
Two commitments produce consistently good seafood: start with fresh, properly selected protein, and pull from heat earlier than you think you need to. Everything else is refinement