Introduction:
Why A Can Of Corned Beef Still Works In Modern Cooking?
Canned corned beef remains one of the most practical pantry proteins. It cooks fast, stores for months, and adapts to breakfast, lunch, or dinner without complex prep. A well-handled can of corned beef recipe can produce crispy texture, deep savory flavor, and balanced nutrition using minimal ingredients. Many people assume it’s only for hash, but that limits its potential. When cooked correctly, it becomes a versatile base for rice bowls, sandwiches, skillet meals, and high-protein breakfasts. The key is understanding fat behavior, salt intensity, and heat control before it hits the pan
What Is Canned Corned Beef And How It Differs From Fresh Corned Beef?
Canned corned beef is cooked, salted, and compressed beef preserved in shelf-stable form. Unlike fresh corned beef brisket, the canned version is already tender and doesn’t require slow cooking. The texture is flaky rather than fibrous, and the fat is distributed throughout the meat block. This changes how it should be cooked. High heat creates crisp edges, while low heat turns it soft. Sodium levels are typically higher, meaning extra salt is rarely needed. Understanding this difference prevents overcooking and seasoning mistakes
Canned Corned Beef Nutrition Facts — The Honest Picture
Before getting into recipes, it’s worth knowing what you’re working with nutritionally, because it shapes how you build a balanced plate around it.
Per 100g serving (USDA data):
Nutrient |
Amount |
| Calories | ~250 kcal |
| Protein | 27g |
| Total Fat | 15g |
| Saturated Fat | 6g |
| Sodium | 897mg |
| Iron | 2.1mg (26% DV) |
| Zinc | 3.6mg (32% DV) |
| Selenium | 43mcg (78% DV) |
| Vitamin B12 | 1.6mcg (~67% DV) |
| Carbohydrates | 0g |
What works in its favor: Canned corned beef delivers a complete protein profile — all nine essential amino acids — alongside meaningful amounts of iron, zinc, selenium, and vitamin B12. Those four nutrients work together on red blood cell production, immune response, DNA synthesis, and thyroid function. For people with limited access to fresh meat or those in calorie-demanding situations (travel, camping, high-output work days), it’s a functional, shelf-stable source of dense nutrition.
Where caution applies: The sodium content is substantial. A single 100g serving carries 897mg — nearly 39% of the 2,300mg daily limit recommended by dietary guidelines, and over half of the 1,500mg that the American Heart Association considers an ideal daily ceiling for cardiovascular health. For anyone managing hypertension or watching sodium intake, portion size and pairing choices matter. Balance the saltiness of canned corned beef with fresh, unsalted sides — unbuttered greens, plain potatoes, fresh tomatoes — rather than adding salt to a dish that already carries a heavy sodium load.
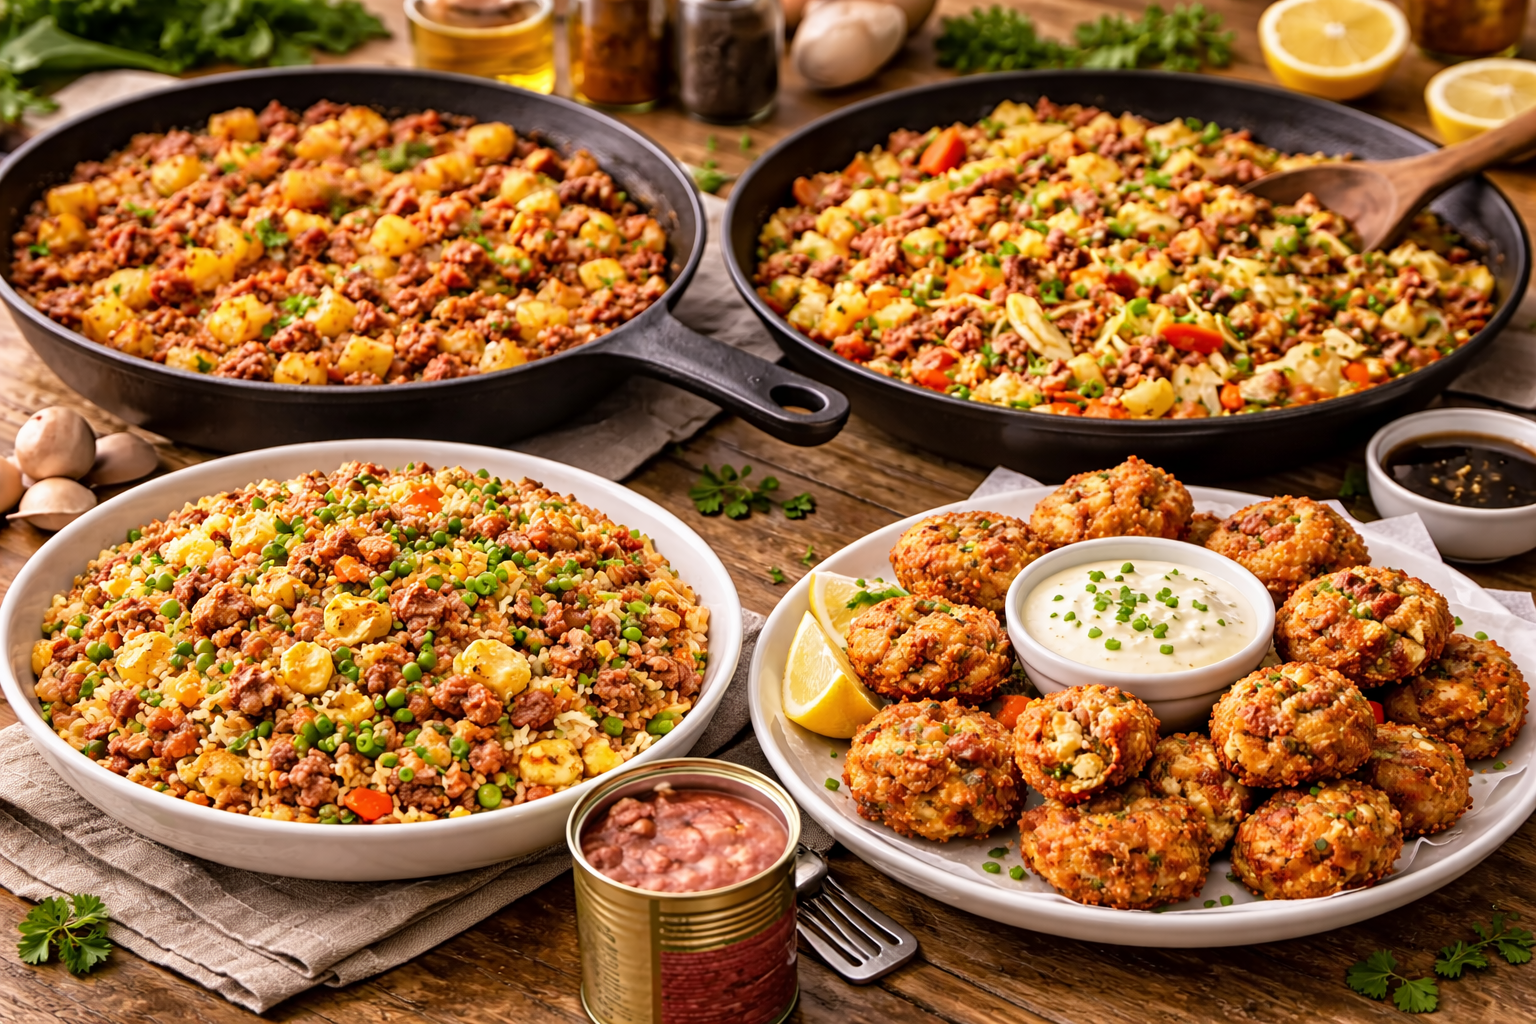
Recipe 1 — Classic Corned Beef Hash With Crispy Potatoes
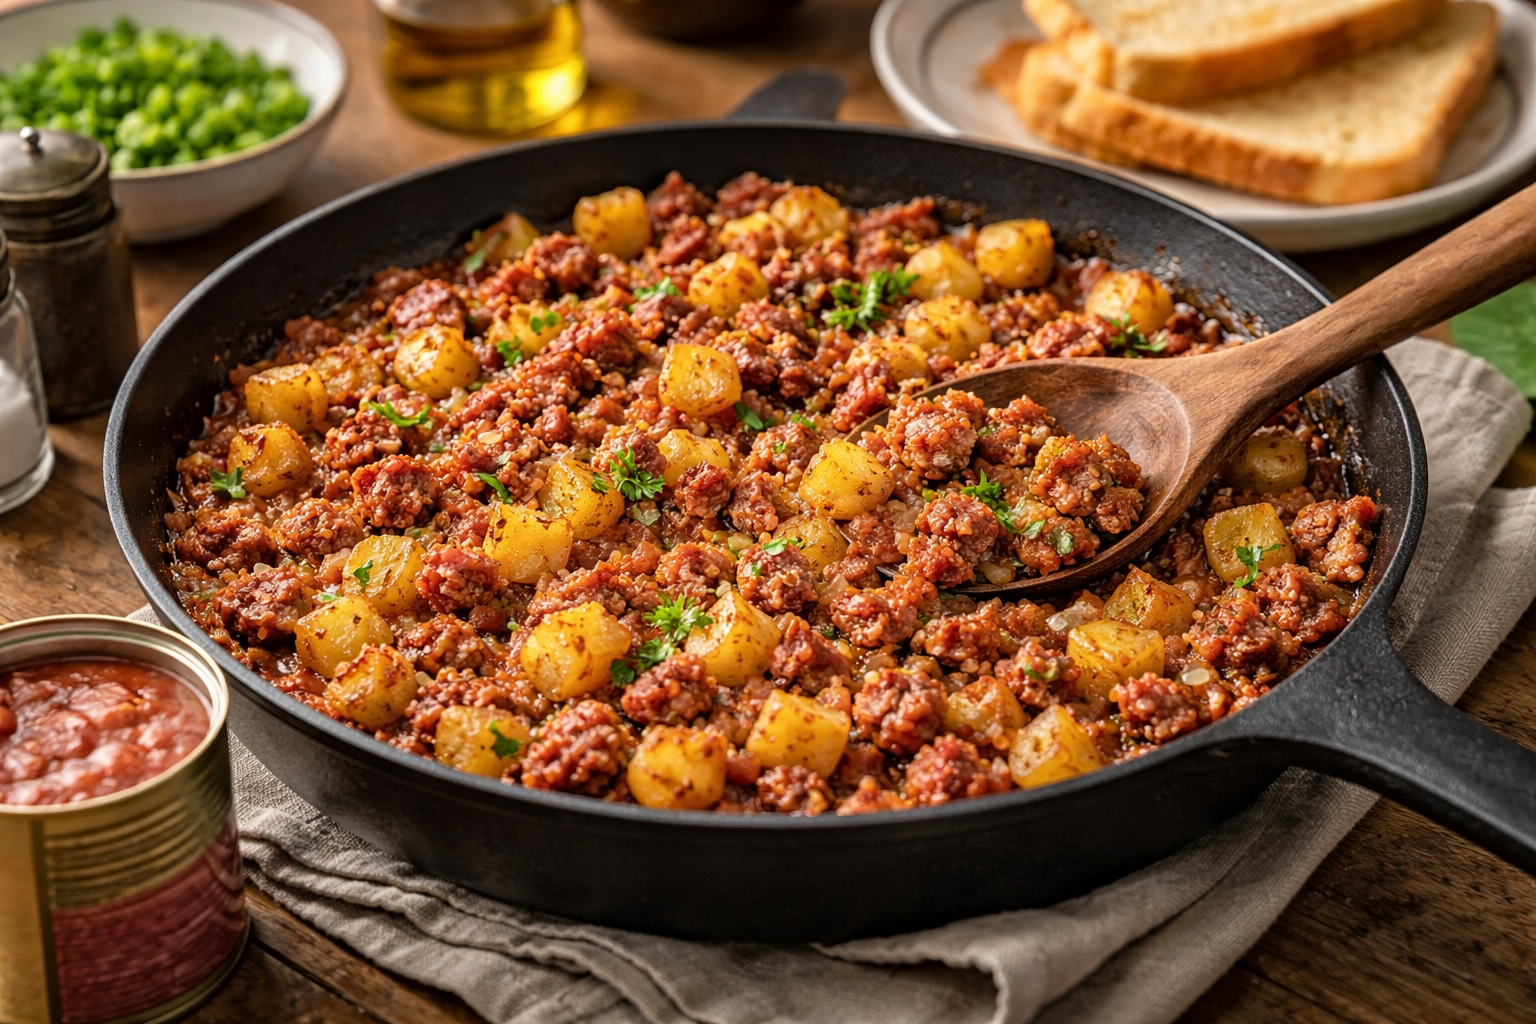
This is the benchmark recipe for any can of corned beef recipe guide, and it’s also the one most commonly made incorrectly. The fix is simple: parboil your potatoes before they go into the pan.
Ingredients (serves 2–3):
- 1 can (340g) corned beef
- 3 medium Yukon Gold or waxy potatoes, diced into 1cm cubes
- 1 medium yellow onion, finely chopped
- 2 cloves garlic, minced
- 1 tbsp apple cider vinegar
- 1 tsp smoked paprika
- Black pepper to taste
- 1 tbsp neutral oil or beef drippings
- 2–3 eggs (optional, for serving)
Method:
- Parboil potato cubes in unsalted water for 5–6 minutes until just barely fork-tender. Drain thoroughly and spread on a towel to dry — surface moisture is the enemy of a crisp hash.
- Heat oil in a cast iron skillet over medium-high heat. Add onion and cook until translucent and slightly caramelized, about 6–7 minutes. Add garlic and paprika, stir for 1 minute.
- Add drained potatoes. Press them flat against the pan and leave undisturbed for 4–5 minutes to develop a crust.
- Add corned beef in rough chunks across the top of the potato mixture. Press gently — do not stir. Cook another 4 minutes.
- Add apple cider vinegar and flip the hash in sections. Press flat again and cook a further 3–4 minutes until the underside crisps.
- Season with black pepper only — the corned beef provides all the salt this dish needs.
- Serve with soft-yolked fried or poached eggs and hot sauce on the side.
Why this works: The parboiling step means the potatoes cook through without needing extended pan time that would dry out the beef. The vinegar lift at the end brightens the whole dish and cuts through the fat. Yukon Golds hold their shape better than starchy russets, which tend to fall apart and turn gluey.
Recipe 2 — Corned Beef and Cabbage Stir-Fry
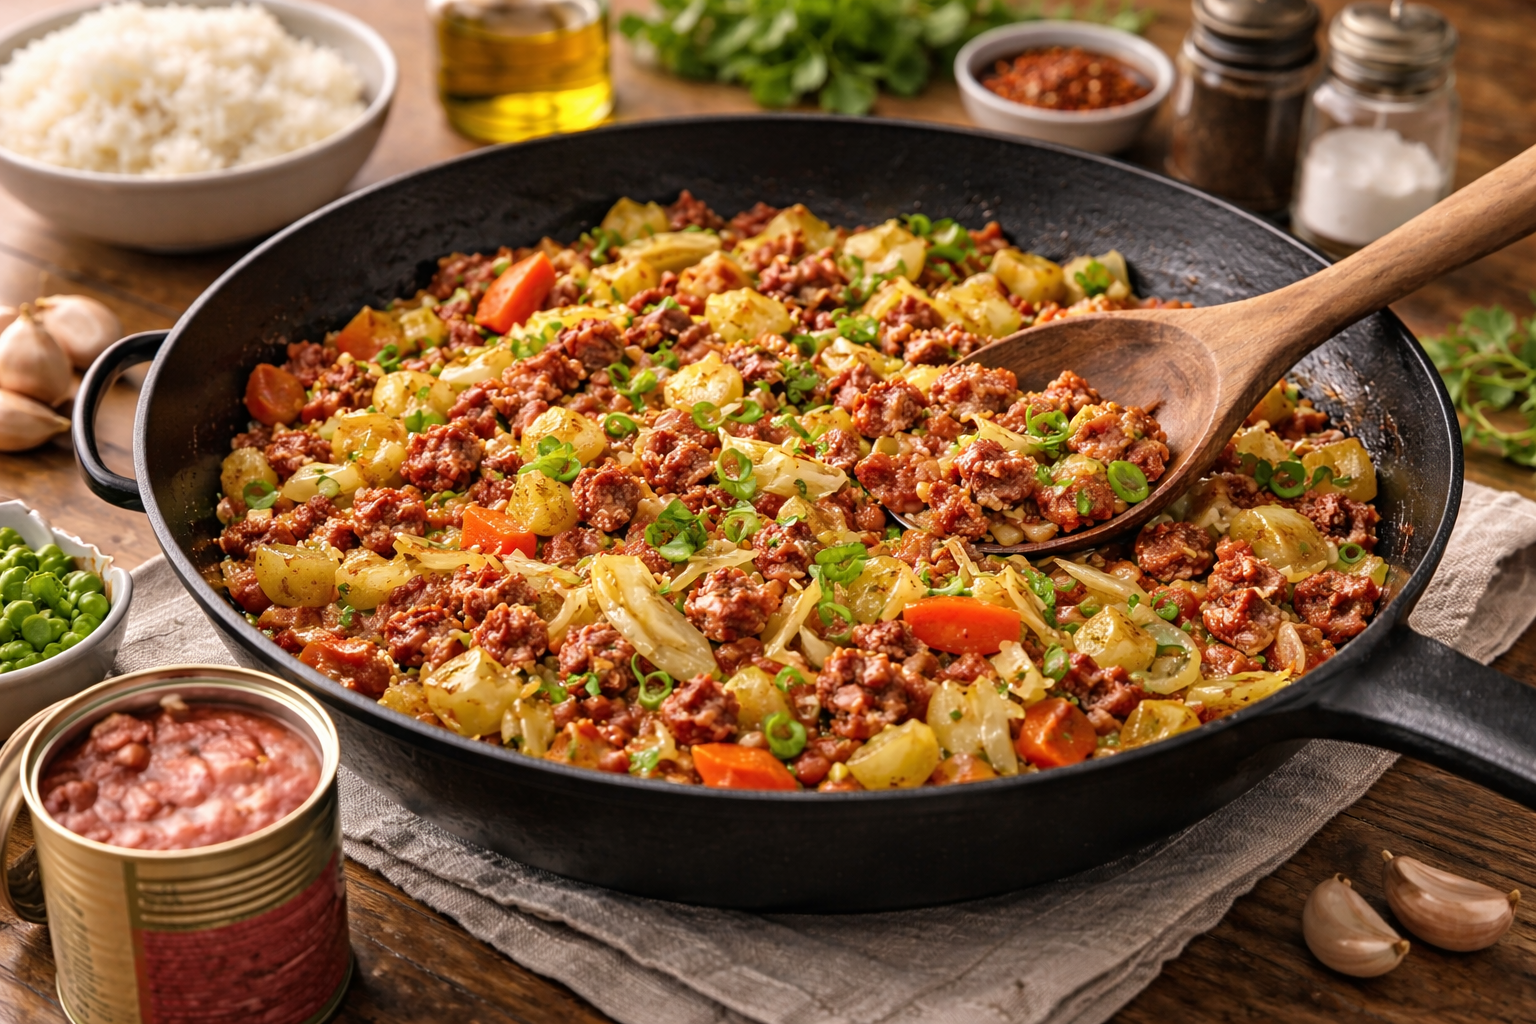
This is the everyday weeknight version of the St. Patrick’s Day classic. It cooks in under 20 minutes from a cold start and uses pantry staples almost everyone has on hand.
Ingredients (serves 3–4):
- 1 can (340g) corned beef
- ½ head green cabbage, roughly chopped
- 1 large carrot, julienned or thinly sliced
- 1 onion, sliced thin
- 3 cloves garlic
- 2 tbsp Worcestershire sauce
- 1 tbsp white wine vinegar or rice vinegar
- ½ tsp caraway seeds (optional but worth it)
- Black pepper, fresh parsley to finish
Method:
- Heat a deep skillet or Dutch oven over medium heat with a thin film of oil. Add onion and carrot, cook 5 minutes until softened.
- Add garlic and caraway seeds, stir 1 minute.
- Add cabbage. Pour in the vinegar and Worcestershire. Cover and steam for 8–10 minutes, stirring halfway, until cabbage wilts and starts to caramelize at the edges.
- Remove the lid, turn the heat to medium-high, and let any excess moisture cook off.
- Break corned beef into rough chunks and fold in gently. Cook 3–4 minutes without stirring, allowing some pieces to develop light color.
- Finish with cracked black pepper and chopped flat-leaf parsley.
Serving note: This dish stands on its own over plain rice or alongside soda bread. Adding potatoes turns it into a one-pot meal. If you want a broth-based soup version, add 2 cups of beef or vegetable stock at step 3 and skip the lid-off reduction.
Recipe 3 — Corned Beef Fritters With Dipping Sauce

This is the most underused application for canned corned beef, and arguably the best. The fritters hold together well, develop a legitimate crust, and work equally as a breakfast component, a snack, or a starter.
Ingredients (makes 8–10 fritters):
- 1 can (340g) corned beef, drained and mashed with a fork
- 1 egg, beaten
- 3 tbsp plain flour
- 2 tbsp finely grated sharp cheddar
- 2 tbsp grated onion (not chopped — grated so it incorporates smoothly)
- ½ tsp black pepper
- ½ tsp garlic powder
- Oil for shallow frying
For a quick dipping sauce:
- 3 tbsp sour cream or plain Greek yogurt
- 1 tsp Dijon mustard
- 1 tsp finely chopped chives or dill
- Squeeze of lemon juice
Method:
- Combine mashed corned beef, egg, flour, cheese, grated onion, pepper, and garlic powder. Mix until it holds together when pressed. If the mixture feels too loose, add another tablespoon of flour. Do not add salt.
- Form into patties roughly 1cm thick and 6cm across. Refrigerate for 15 minutes — this helps them hold shape in the pan.
- Heat oil in a non-stick or cast iron pan over medium heat. Cook fritters 3–4 minutes per side until deep golden brown. Don’t rush the heat — high heat produces a dark exterior with a cold center.
- Drain briefly on a paper towel and serve immediately with the dipping sauce.
These reheat well in an oven at 180°C / 350°F for 8 minutes, making them a practical make-ahead option.
Recipe 4 — Corned Beef Fried Rice
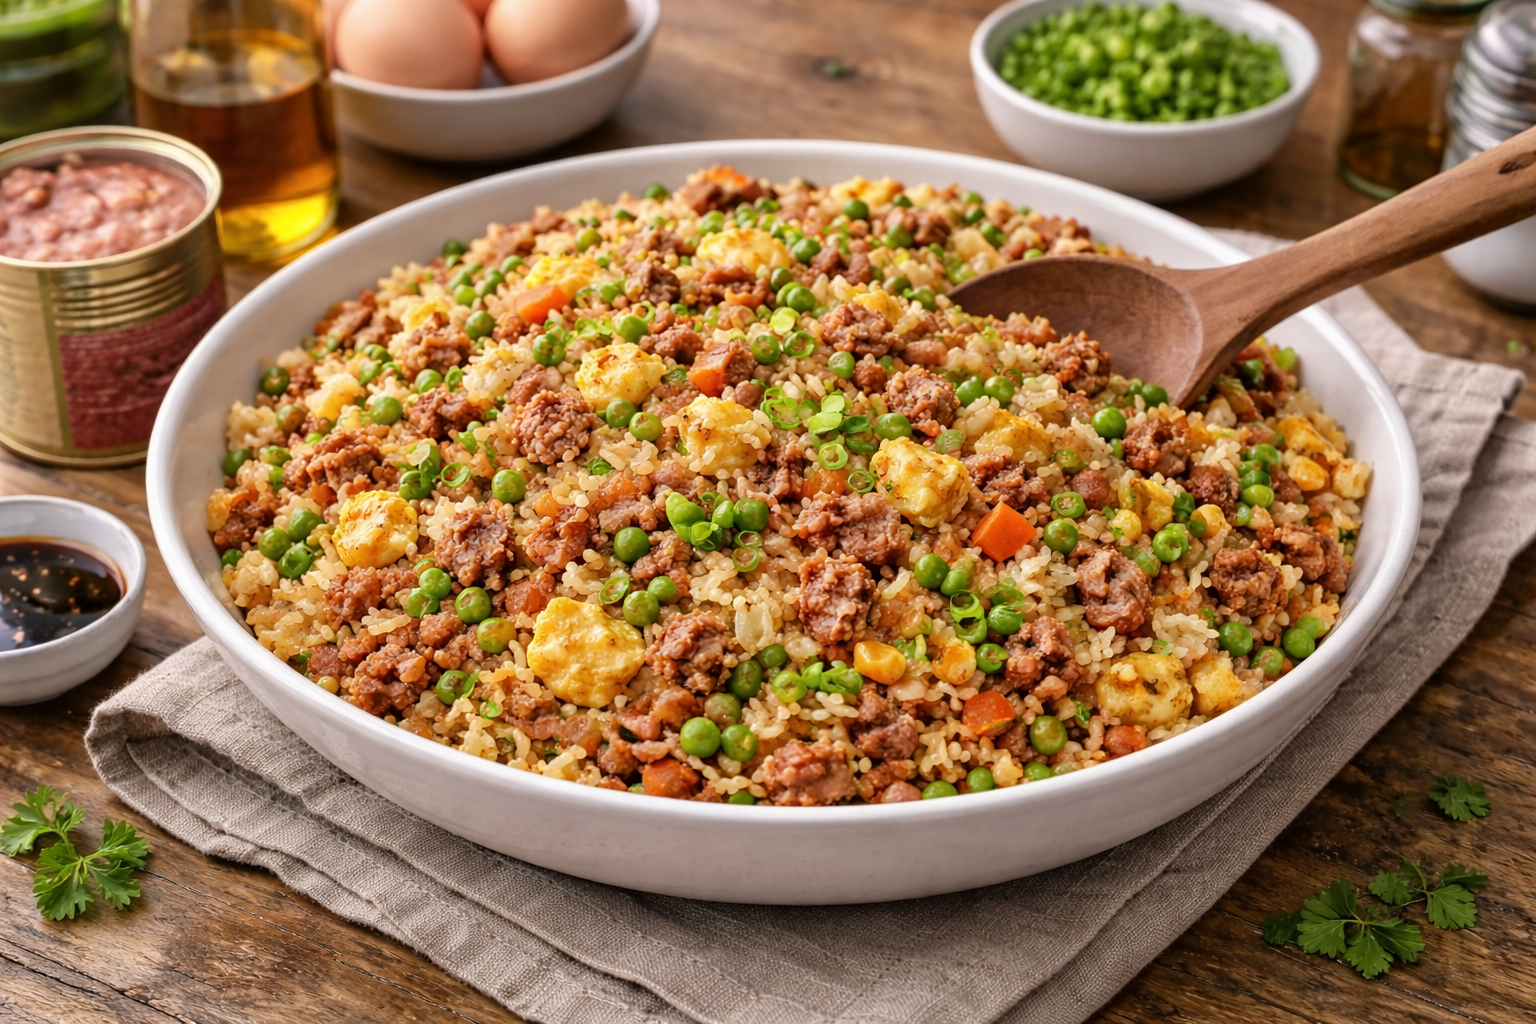
This is an adaptation of a Philippine home-cooking tradition where canned corned beef with garlic-fried rice (sinangag) is a staple breakfast. It’s also one of the smartest ways to stretch one can into a meal for four.
Ingredients (serves 4):
- 1 can (340g) corned beef
- 3 cups cold cooked rice (day-old works best — freshly cooked rice is too moist)
- 4 cloves garlic, minced
- 1 small onion, finely diced
- 2 eggs, scrambled separately and set aside
- 2 tbsp soy sauce or tamari
- 1 tsp sesame oil
- 1 tbsp neutral oil
- Sliced spring onions, chili flakes to finish
Method:
- Heat neutral oil in a wok or wide skillet over high heat. Add garlic — it should sizzle immediately — and stir 30 seconds.
- Add onion, stir-fry 2 minutes.
- Add cold rice and press it against the hot surface. Let it sit undisturbed for 2 minutes to toast, then stir and repeat.
- Add corned beef in chunks. Press into rice and cook without stirring for 2 minutes to let the meat brown against the pan surface.
- Drizzle soy sauce and sesame oil. Toss everything together. Fold in scrambled eggs.
- Serve topped with spring onions and chili flakes. A fried egg on top is optional but recommended.
Cold rice is non-negotiable here. Warm rice releases steam into the pan, which prevents browning and turns the dish into a clumped, soggy mass. If you only have fresh rice, spread it on a baking sheet and refrigerate uncovered for 30 minutes before cooking.
Sodium Management — Making These Recipes Work for Different Dietary Needs
Every recipe above relies on the salt content of the corned beef itself as the primary seasoning source. That’s intentional, and it’s important to carry that principle forward when you adapt these recipes.
Never add salt directly to a dish containing canned corned beef before tasting it first. In testing, the hash recipe above hits approximately 600–700mg of sodium per portion from the beef alone — already a significant contribution to the daily total. Pairing with unsalted sides, fresh vegetables, or acidic elements like vinegar and citrus balances the palate without adding to the load.
For people with sodium sensitivity or hypertension, rinsing the corned beef briefly under cold water before cooking reduces surface sodium — not dramatically, but measurably. The tradeoff is some loss of the curing flavor that makes the beef distinctive.
Buying lower-sodium canned varieties — which are available from several brands and typically carry around 25–30% less sodium per serving — is the more effective approach if you cook with canned corned beef regularly.
Pairing suggestions that naturally reduce the effective sodium experience of a meal:
- Plain boiled or steamed potatoes (no added salt)
- Fresh tomato salad with olive oil, no dressing
- Blanched greens — kale, spinach, green beans — with lemon
- Plain rice or pearl barley
These sides absorb some of the saltiness from the beef while adding fiber, potassium, and micronutrients that the beef itself lacks.
Storage, Shelf Life, and Opened-Can Handling
An unopened can of corned beef can last 3–5 years at room temperature in a cool, dry pantry — one of the longest shelf lives of any ready-to-use protein. Once opened, transfer unused portions to an airtight glass container and refrigerate. Use within 3–4 days. Freezing is possible but not ideal — the texture becomes slightly more crumbly on thawing, which is fine for hash and fried rice but less suitable for fritters or sliced applications.
Never store opened canned meat in the tin itself. The metal interior begins to interact with the food once the seal is broken, and the flavor quality drops noticeably within 24 hours.
Final Thoughts — Getting More Out of Every Can
Canned corned beef rewards a bit of intentionality. Once you understand that it’s already cooked, that its fat content is an asset rather than a problem, and that texture comes from how you apply heat rather than how long you apply it, the range of what you can do with a single can expands considerably.
The four recipes here — hash, cabbage stir-fry, fritters, and fried rice — each draw on a different technique and a different culinary tradition. Between them, they cover breakfast through dinner, stovetop through oven, and quick weeknight meals through make-ahead prep. That versatility is the real argument for keeping a couple of cans in your pantry. High heat, minimal stirring, and controlled fat usage create the crisp texture most people miss. From breakfast hashes to quick sandwiches and skillet dinners, canned corned beef works as a flexible protein that cooks in minutes. Balancing it with vegetables, eggs, or starch improves nutrition while stretching portions. Once you understand the base method, small changes in seasoning and add-ins produce completely different meals without extra effort. This makes canned corned beef one of the most efficient, budget-friendly, and adaptable pantry staples for fast home cooking.